 AppleID登录
# 1. 申请应用
# 1.1 申请 Apple 开发者账号
- 登录 Apple 开发者中心:Apple 开发者中心 (opens new window)
- 请确保你已经申请了苹果开发者账号,否则无法进行以下操作。
- 申请个人账号地址:https://developer.apple.com/programs/
- 申请企业账号地址:https://developer.apple.com/programs/enterprise/
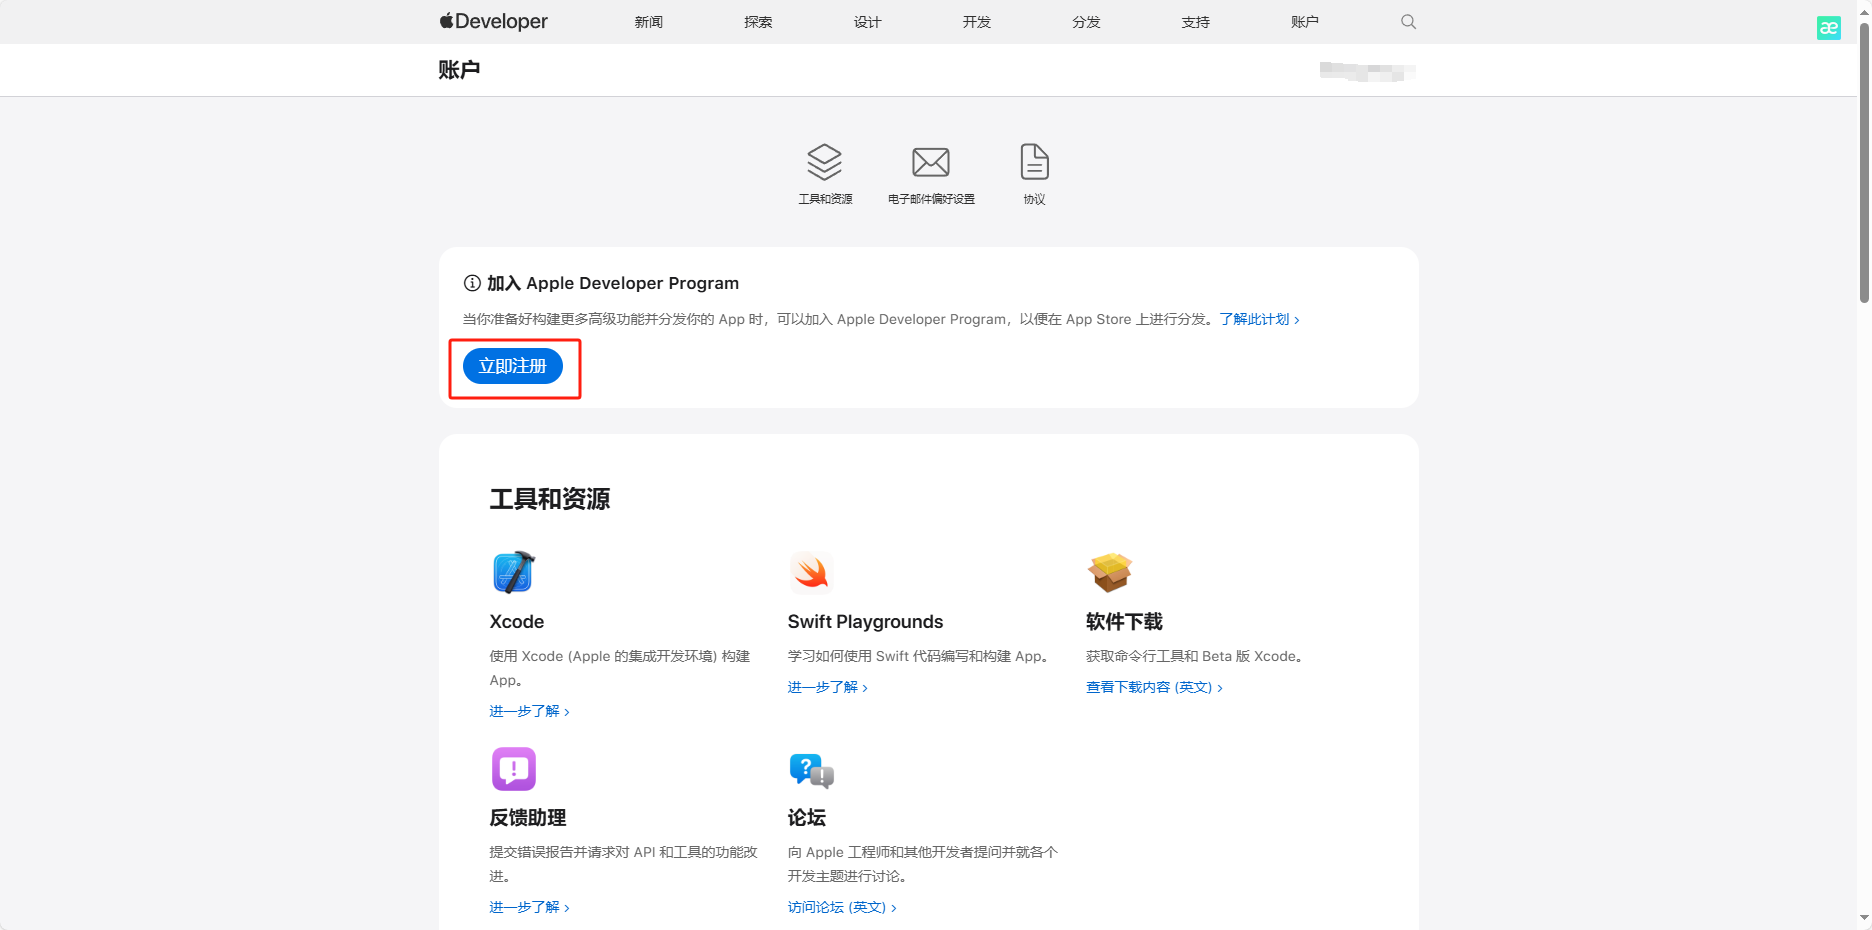
如果未认证 Apple 开发者,需要先注册+认证
# 1.2 在 Apple 开发者中心进行配置
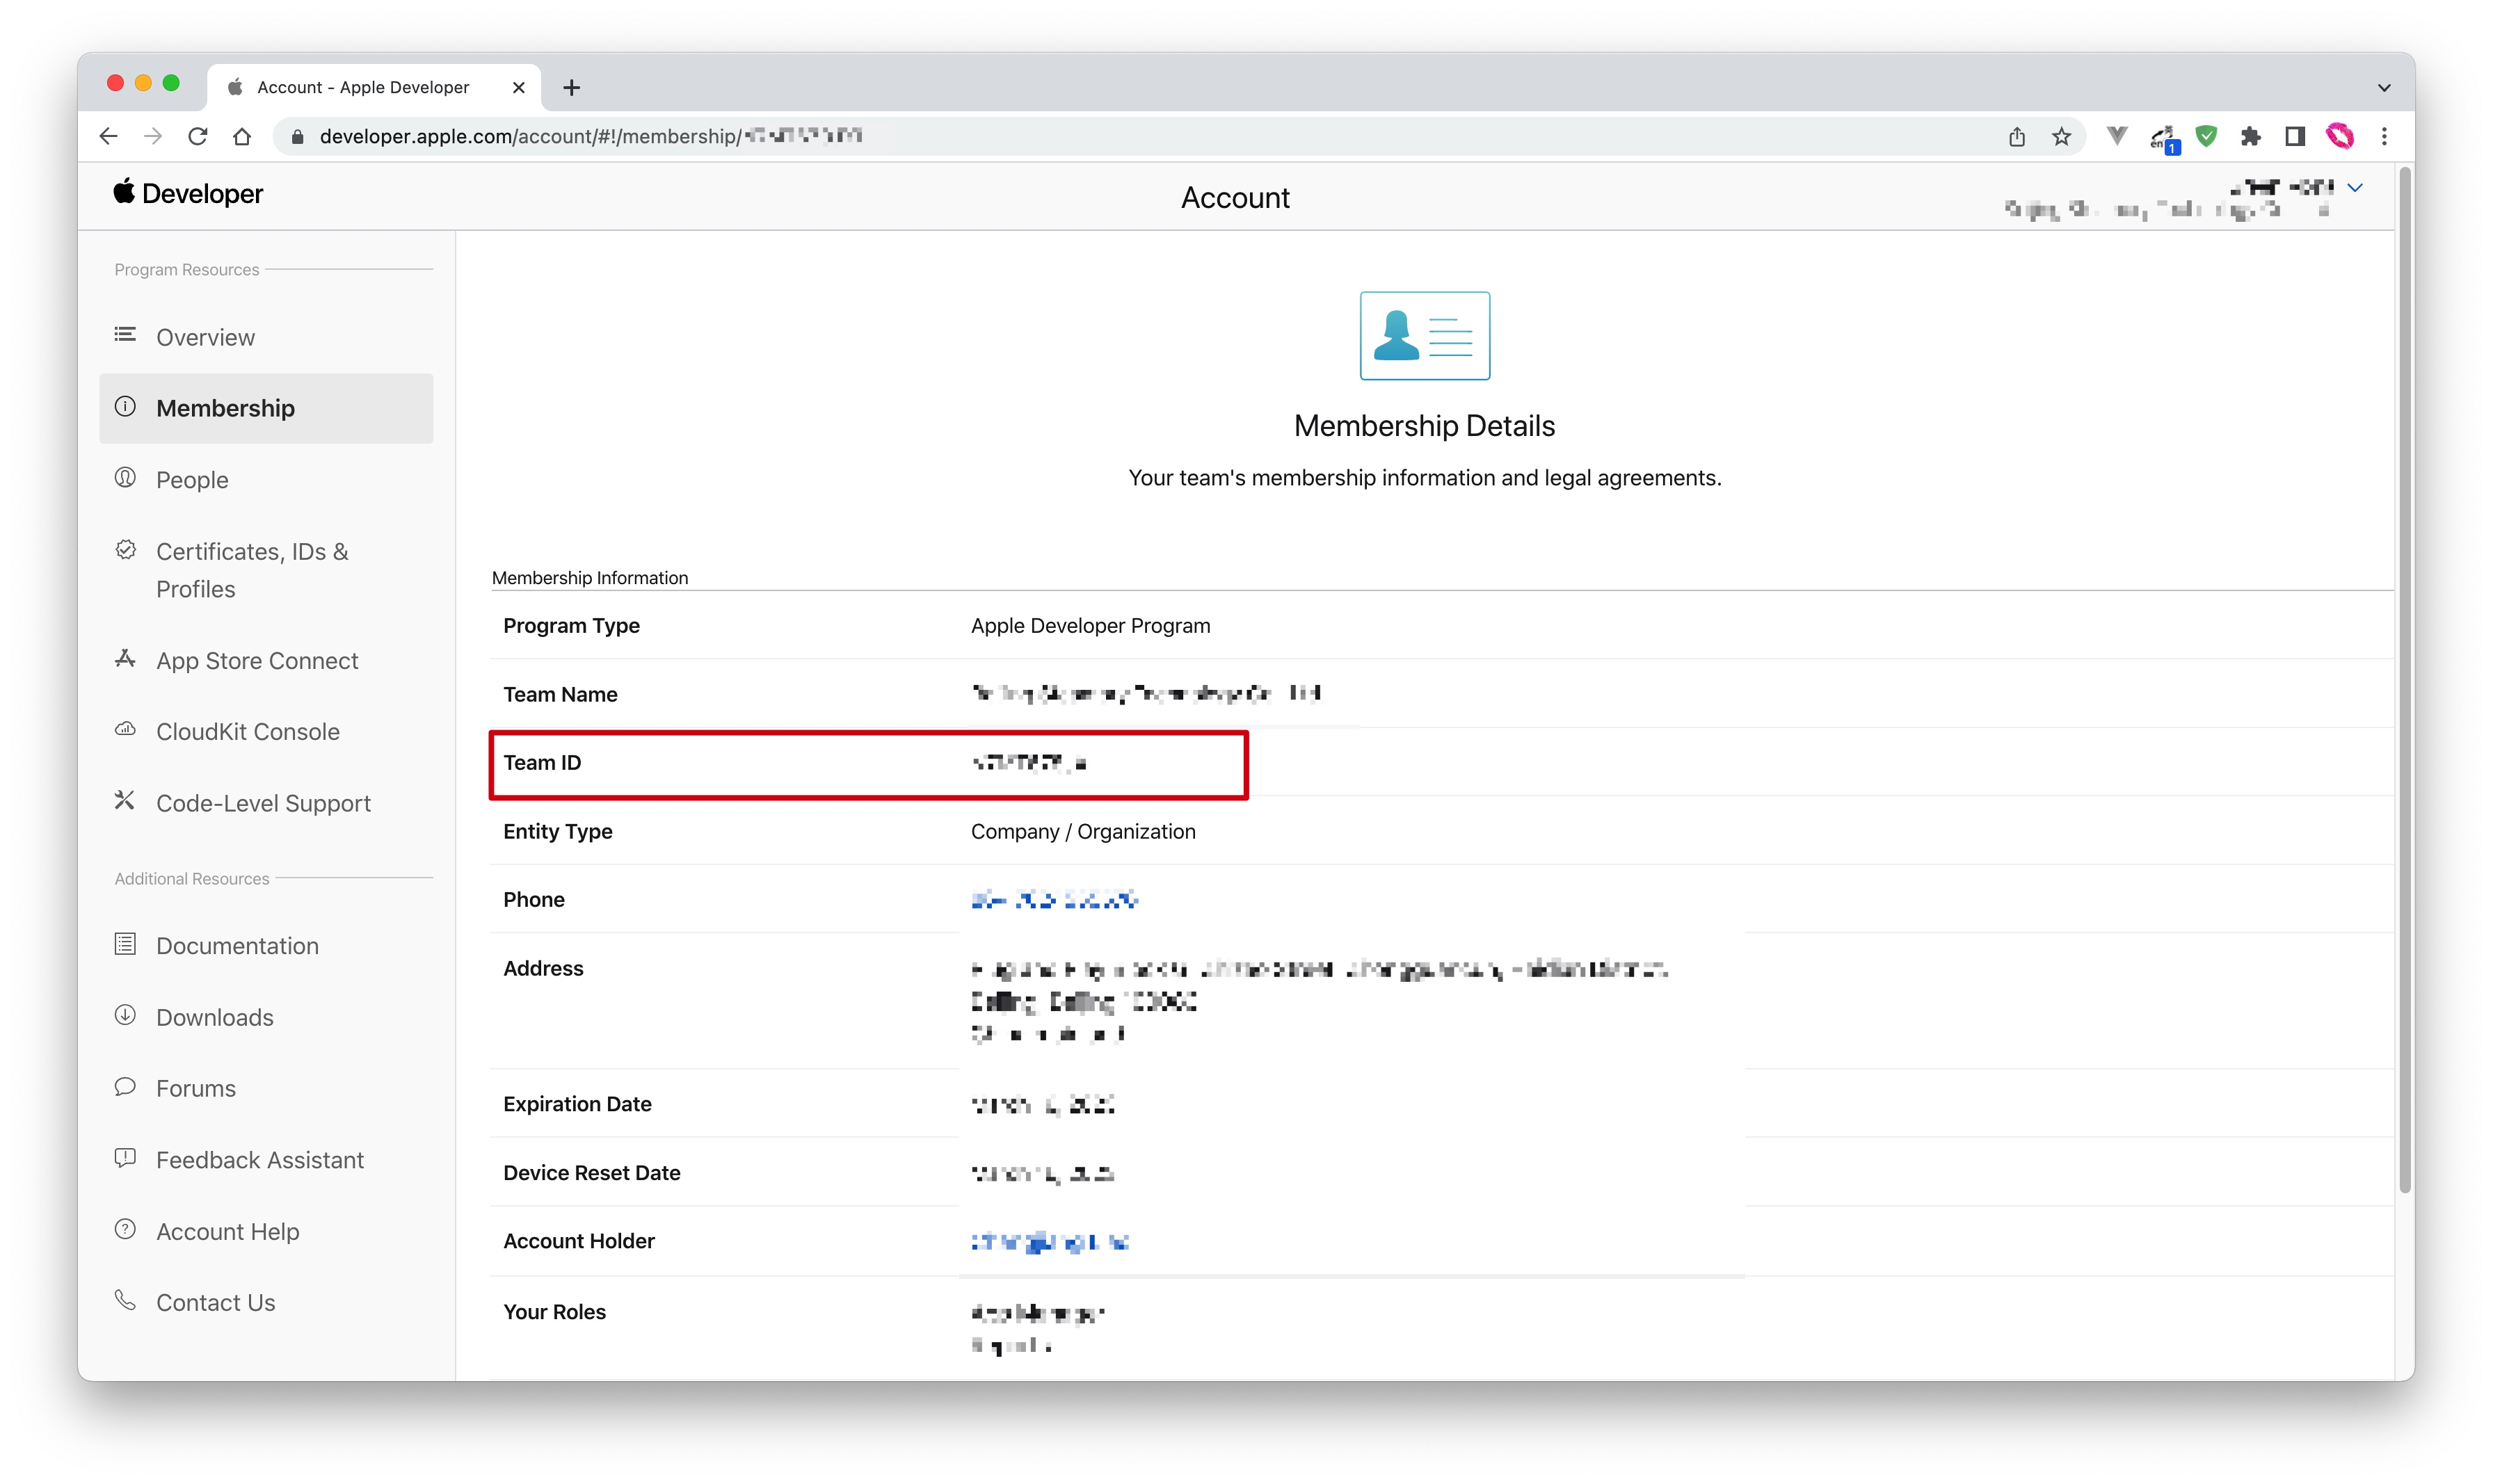
# 获取 Team ID
进入 Apple Developer Portal 的 Membership (opens new window) 页面,获取 Team ID:
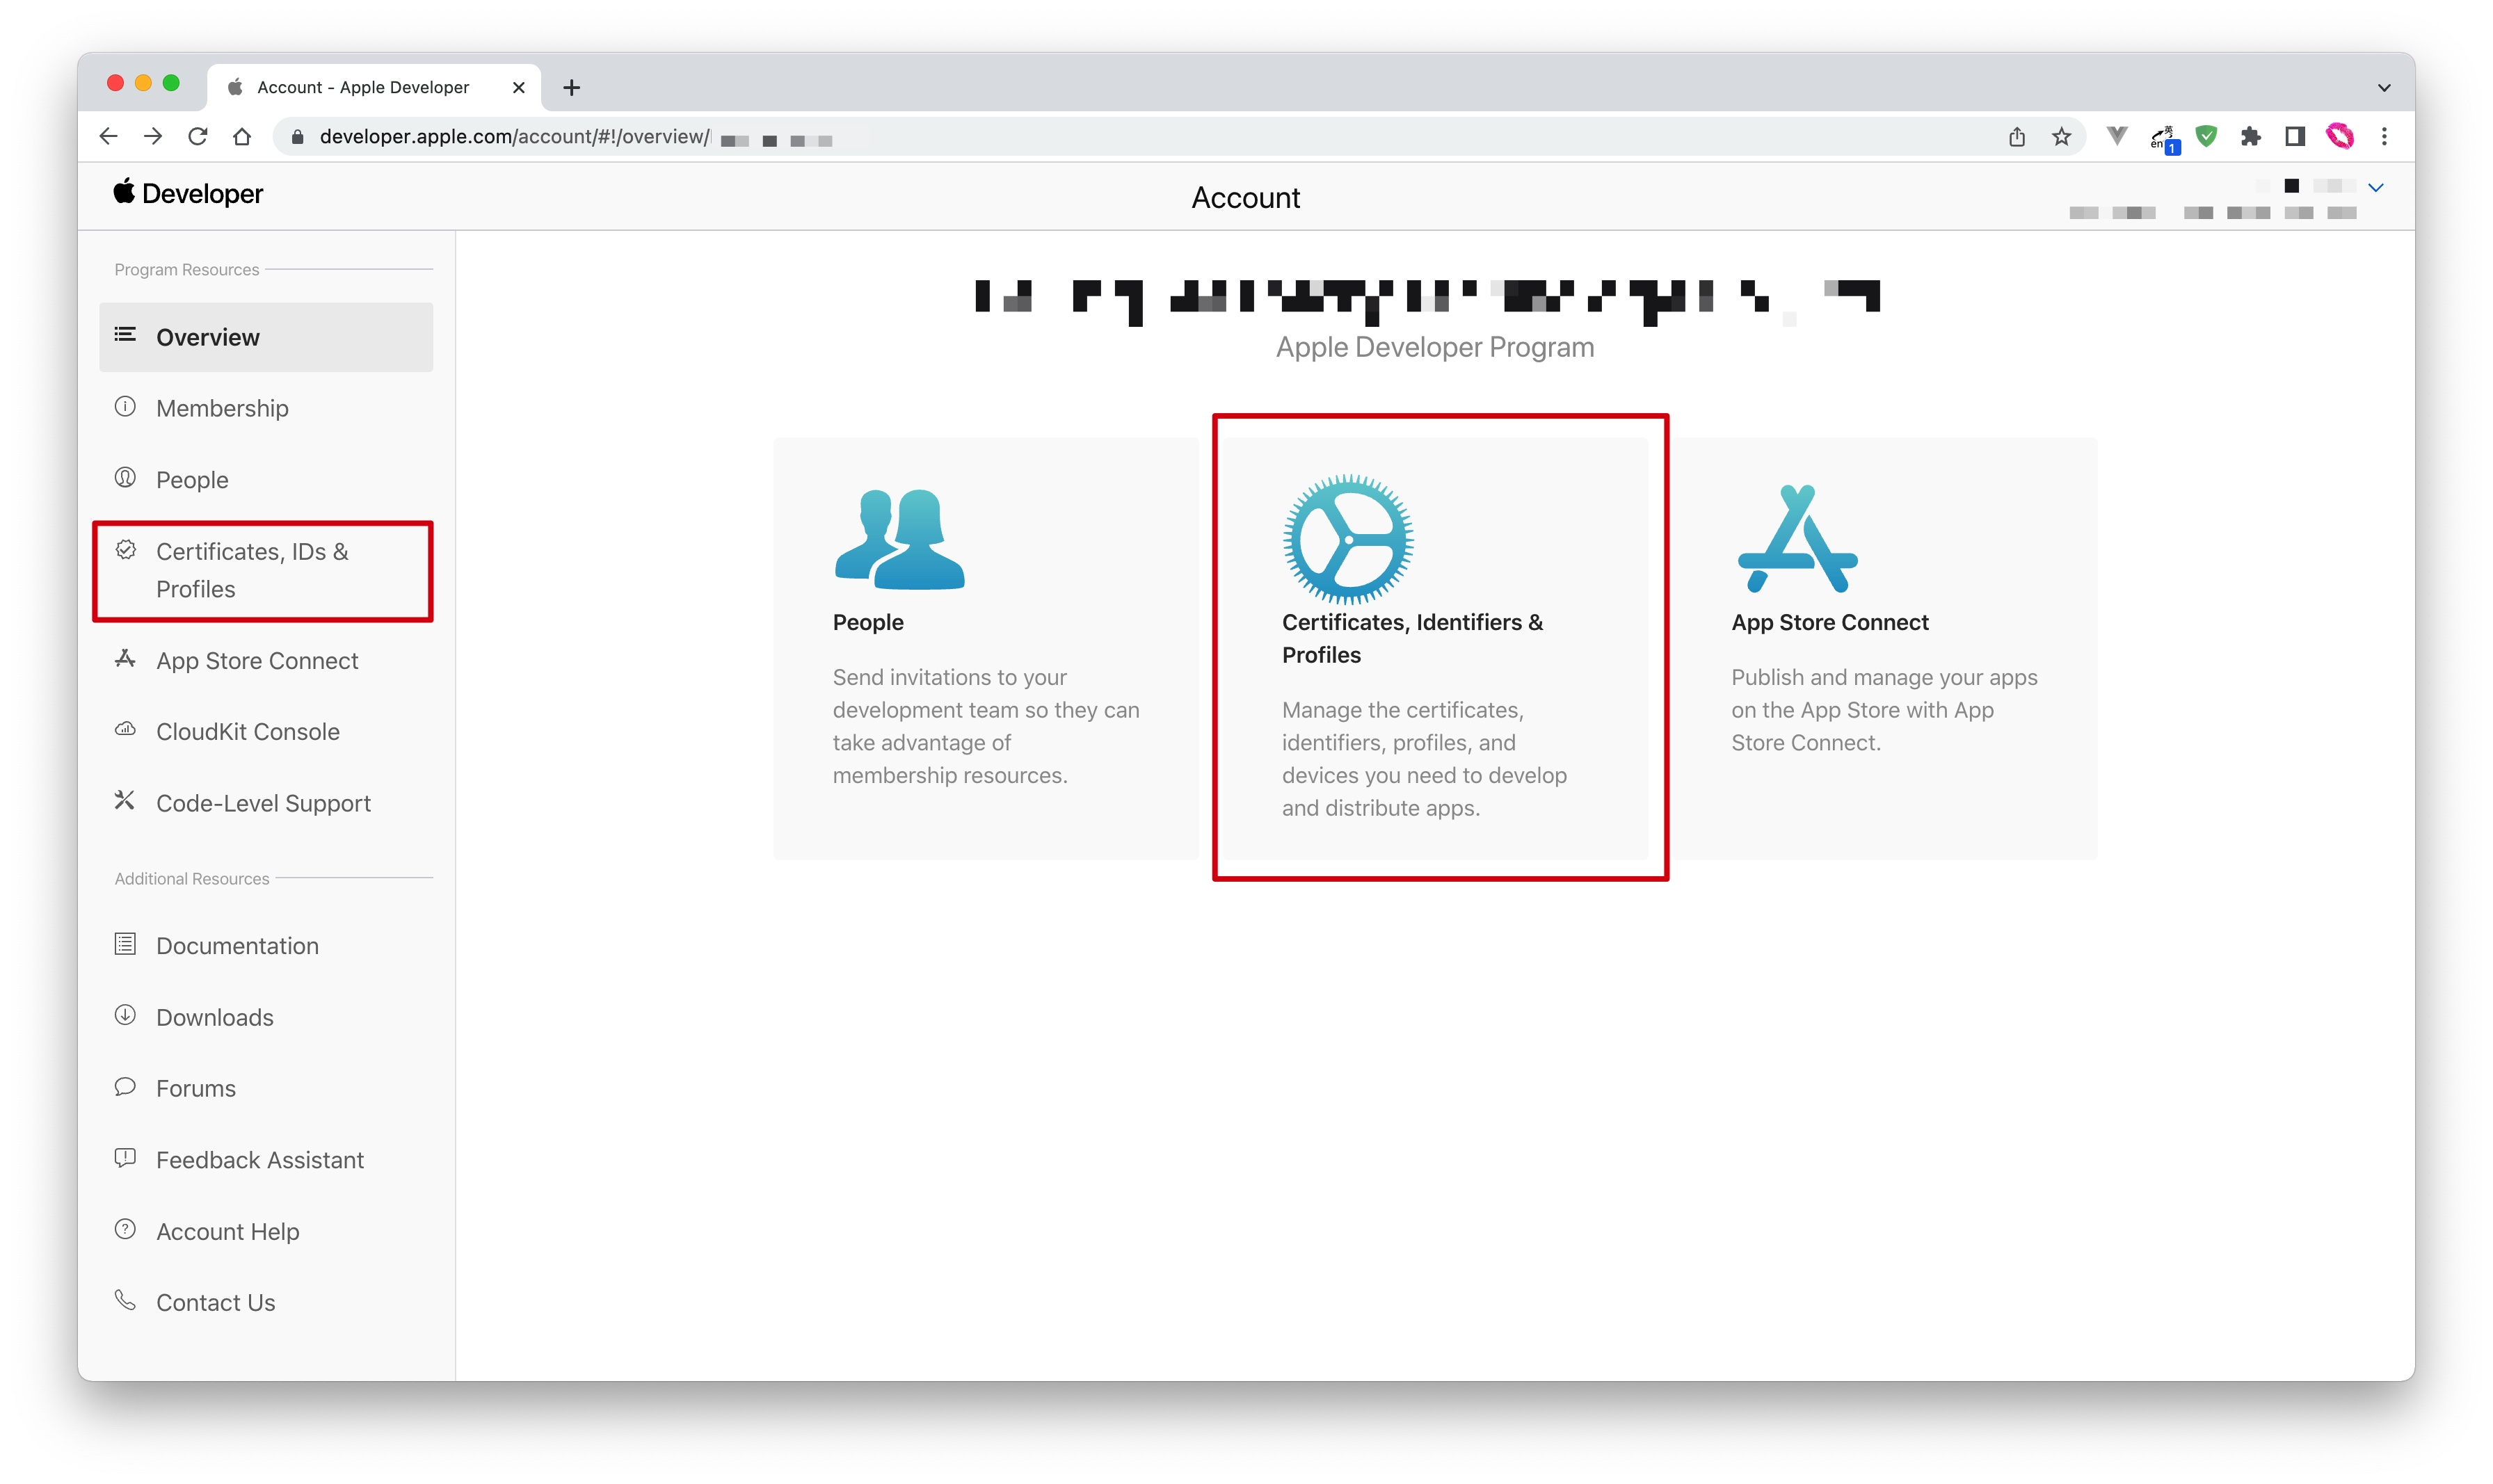
# 获取 App ID
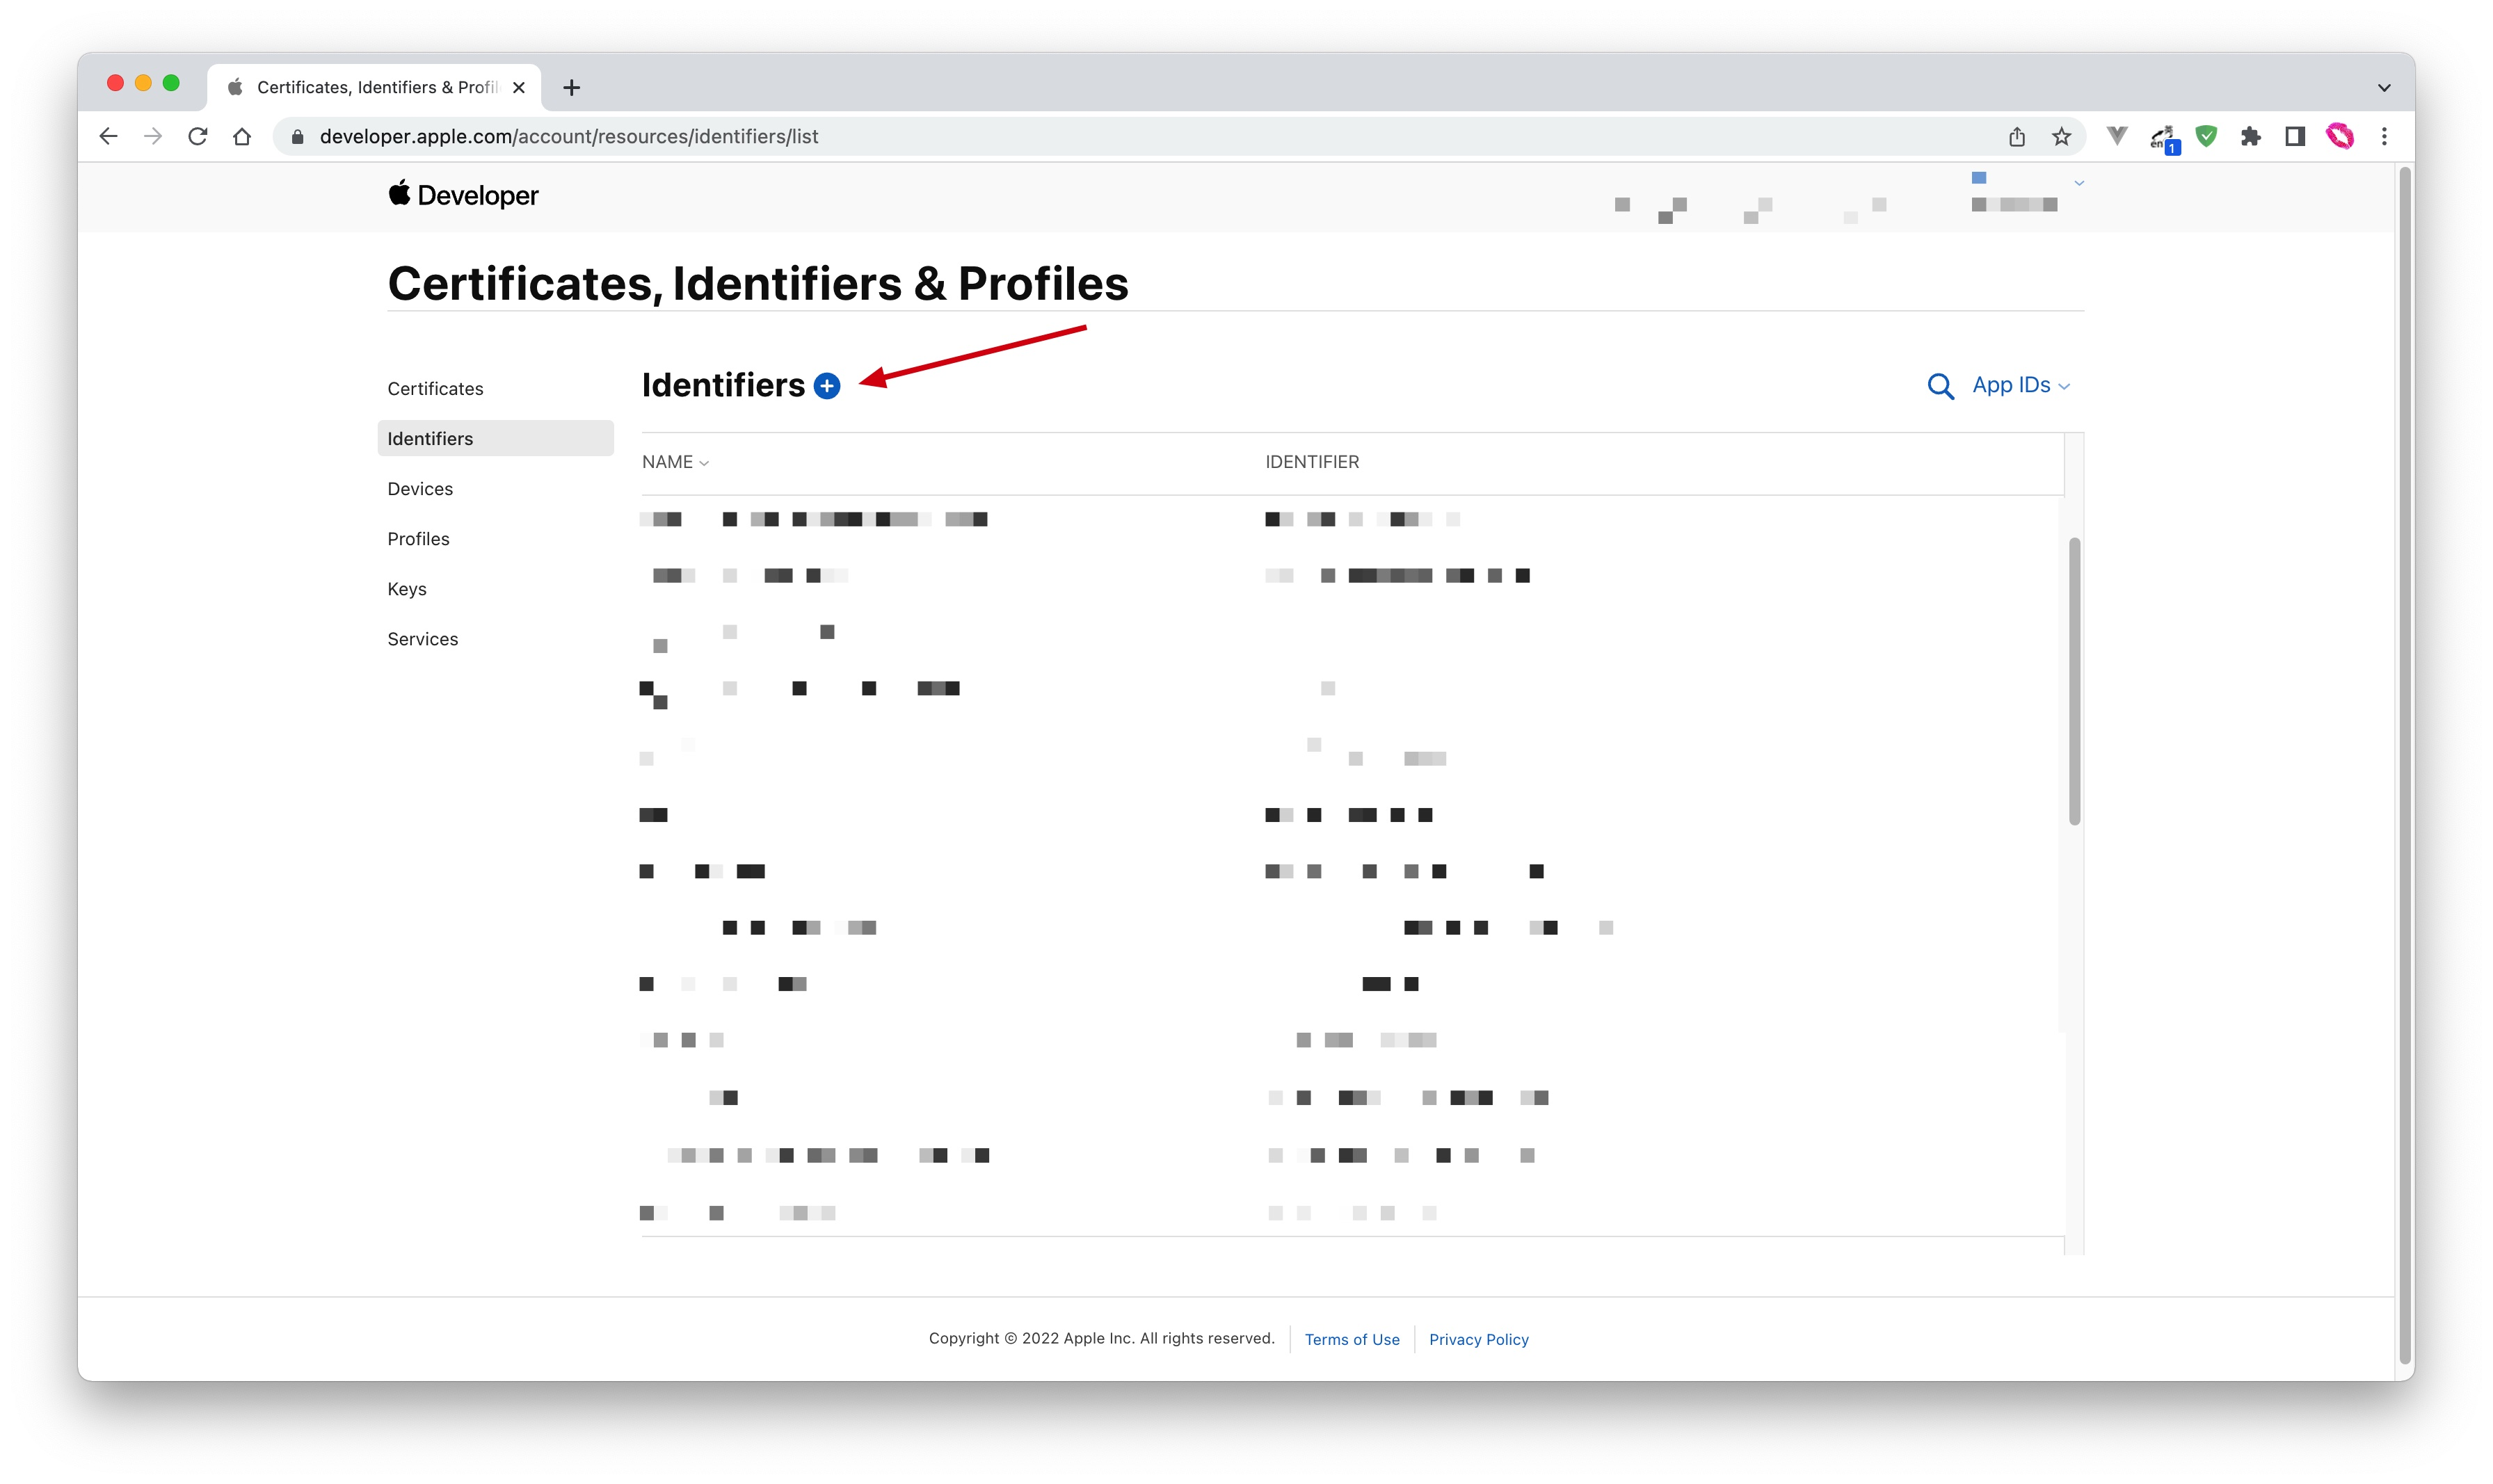
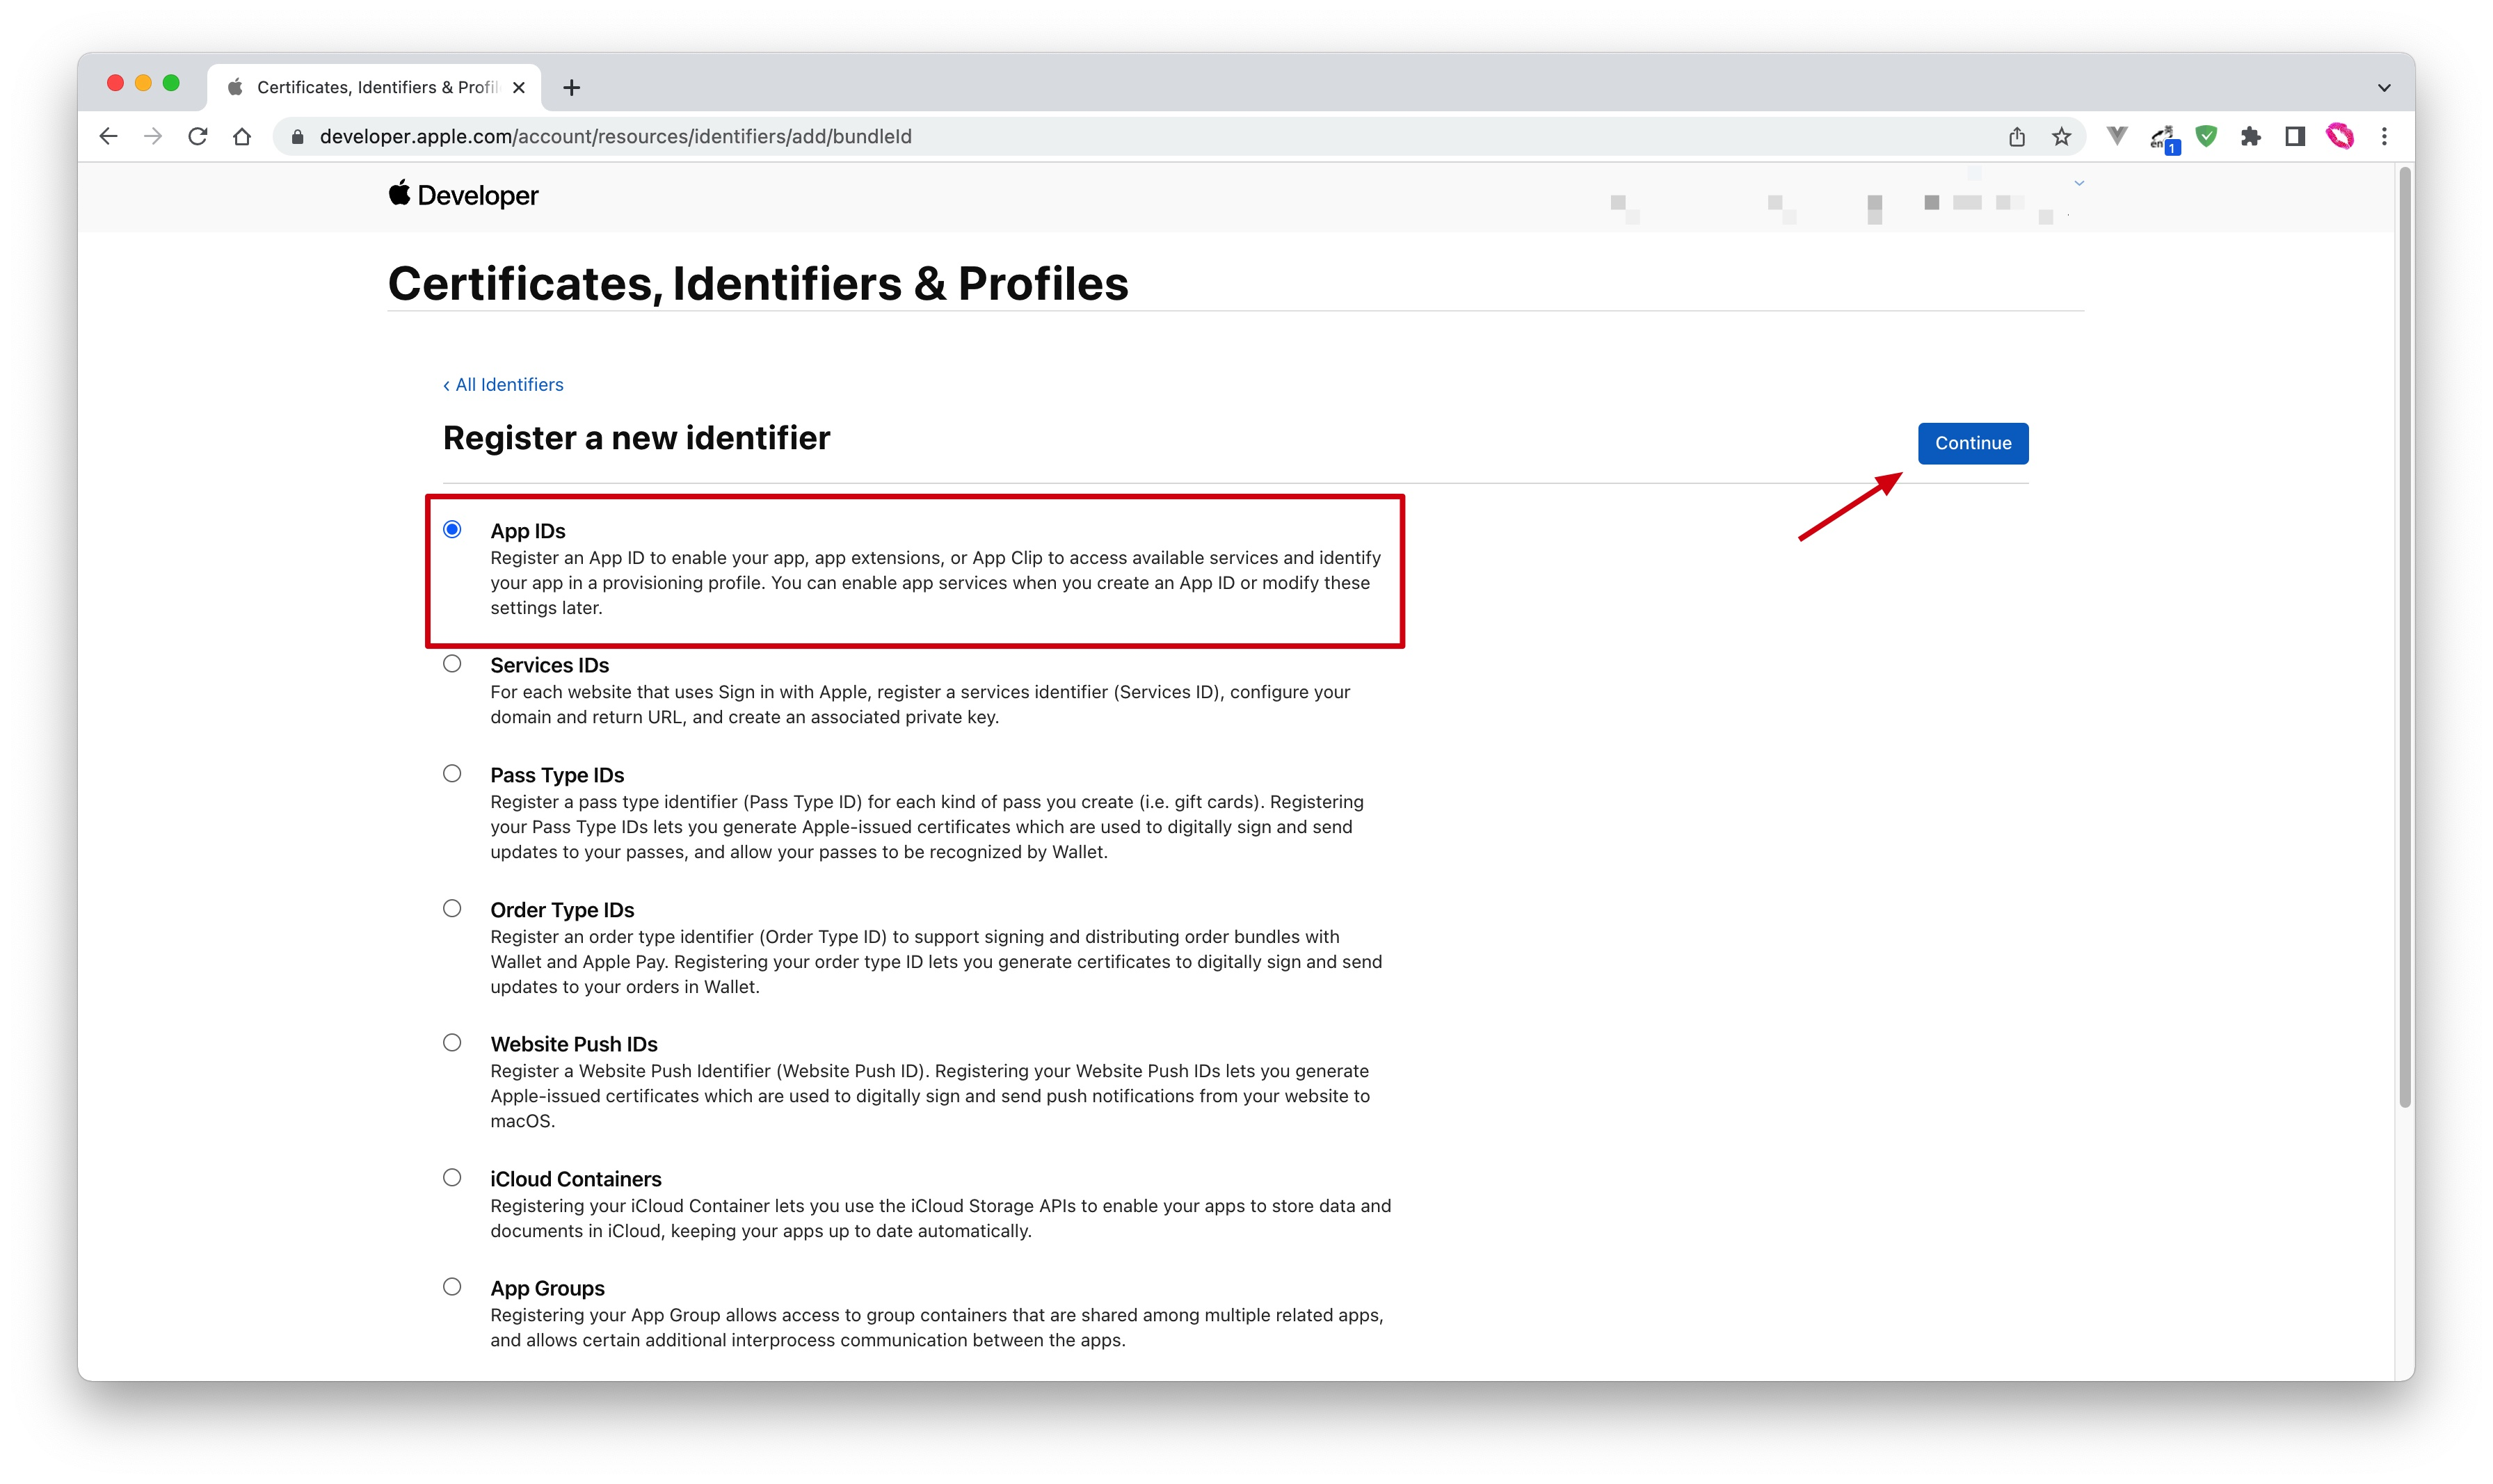
在 Certificates, Identifiers & Profiles > Identifiers 页面,点击 ➕ 图标创建应用
选择 App IDs 然后点击 Continue 按钮继续
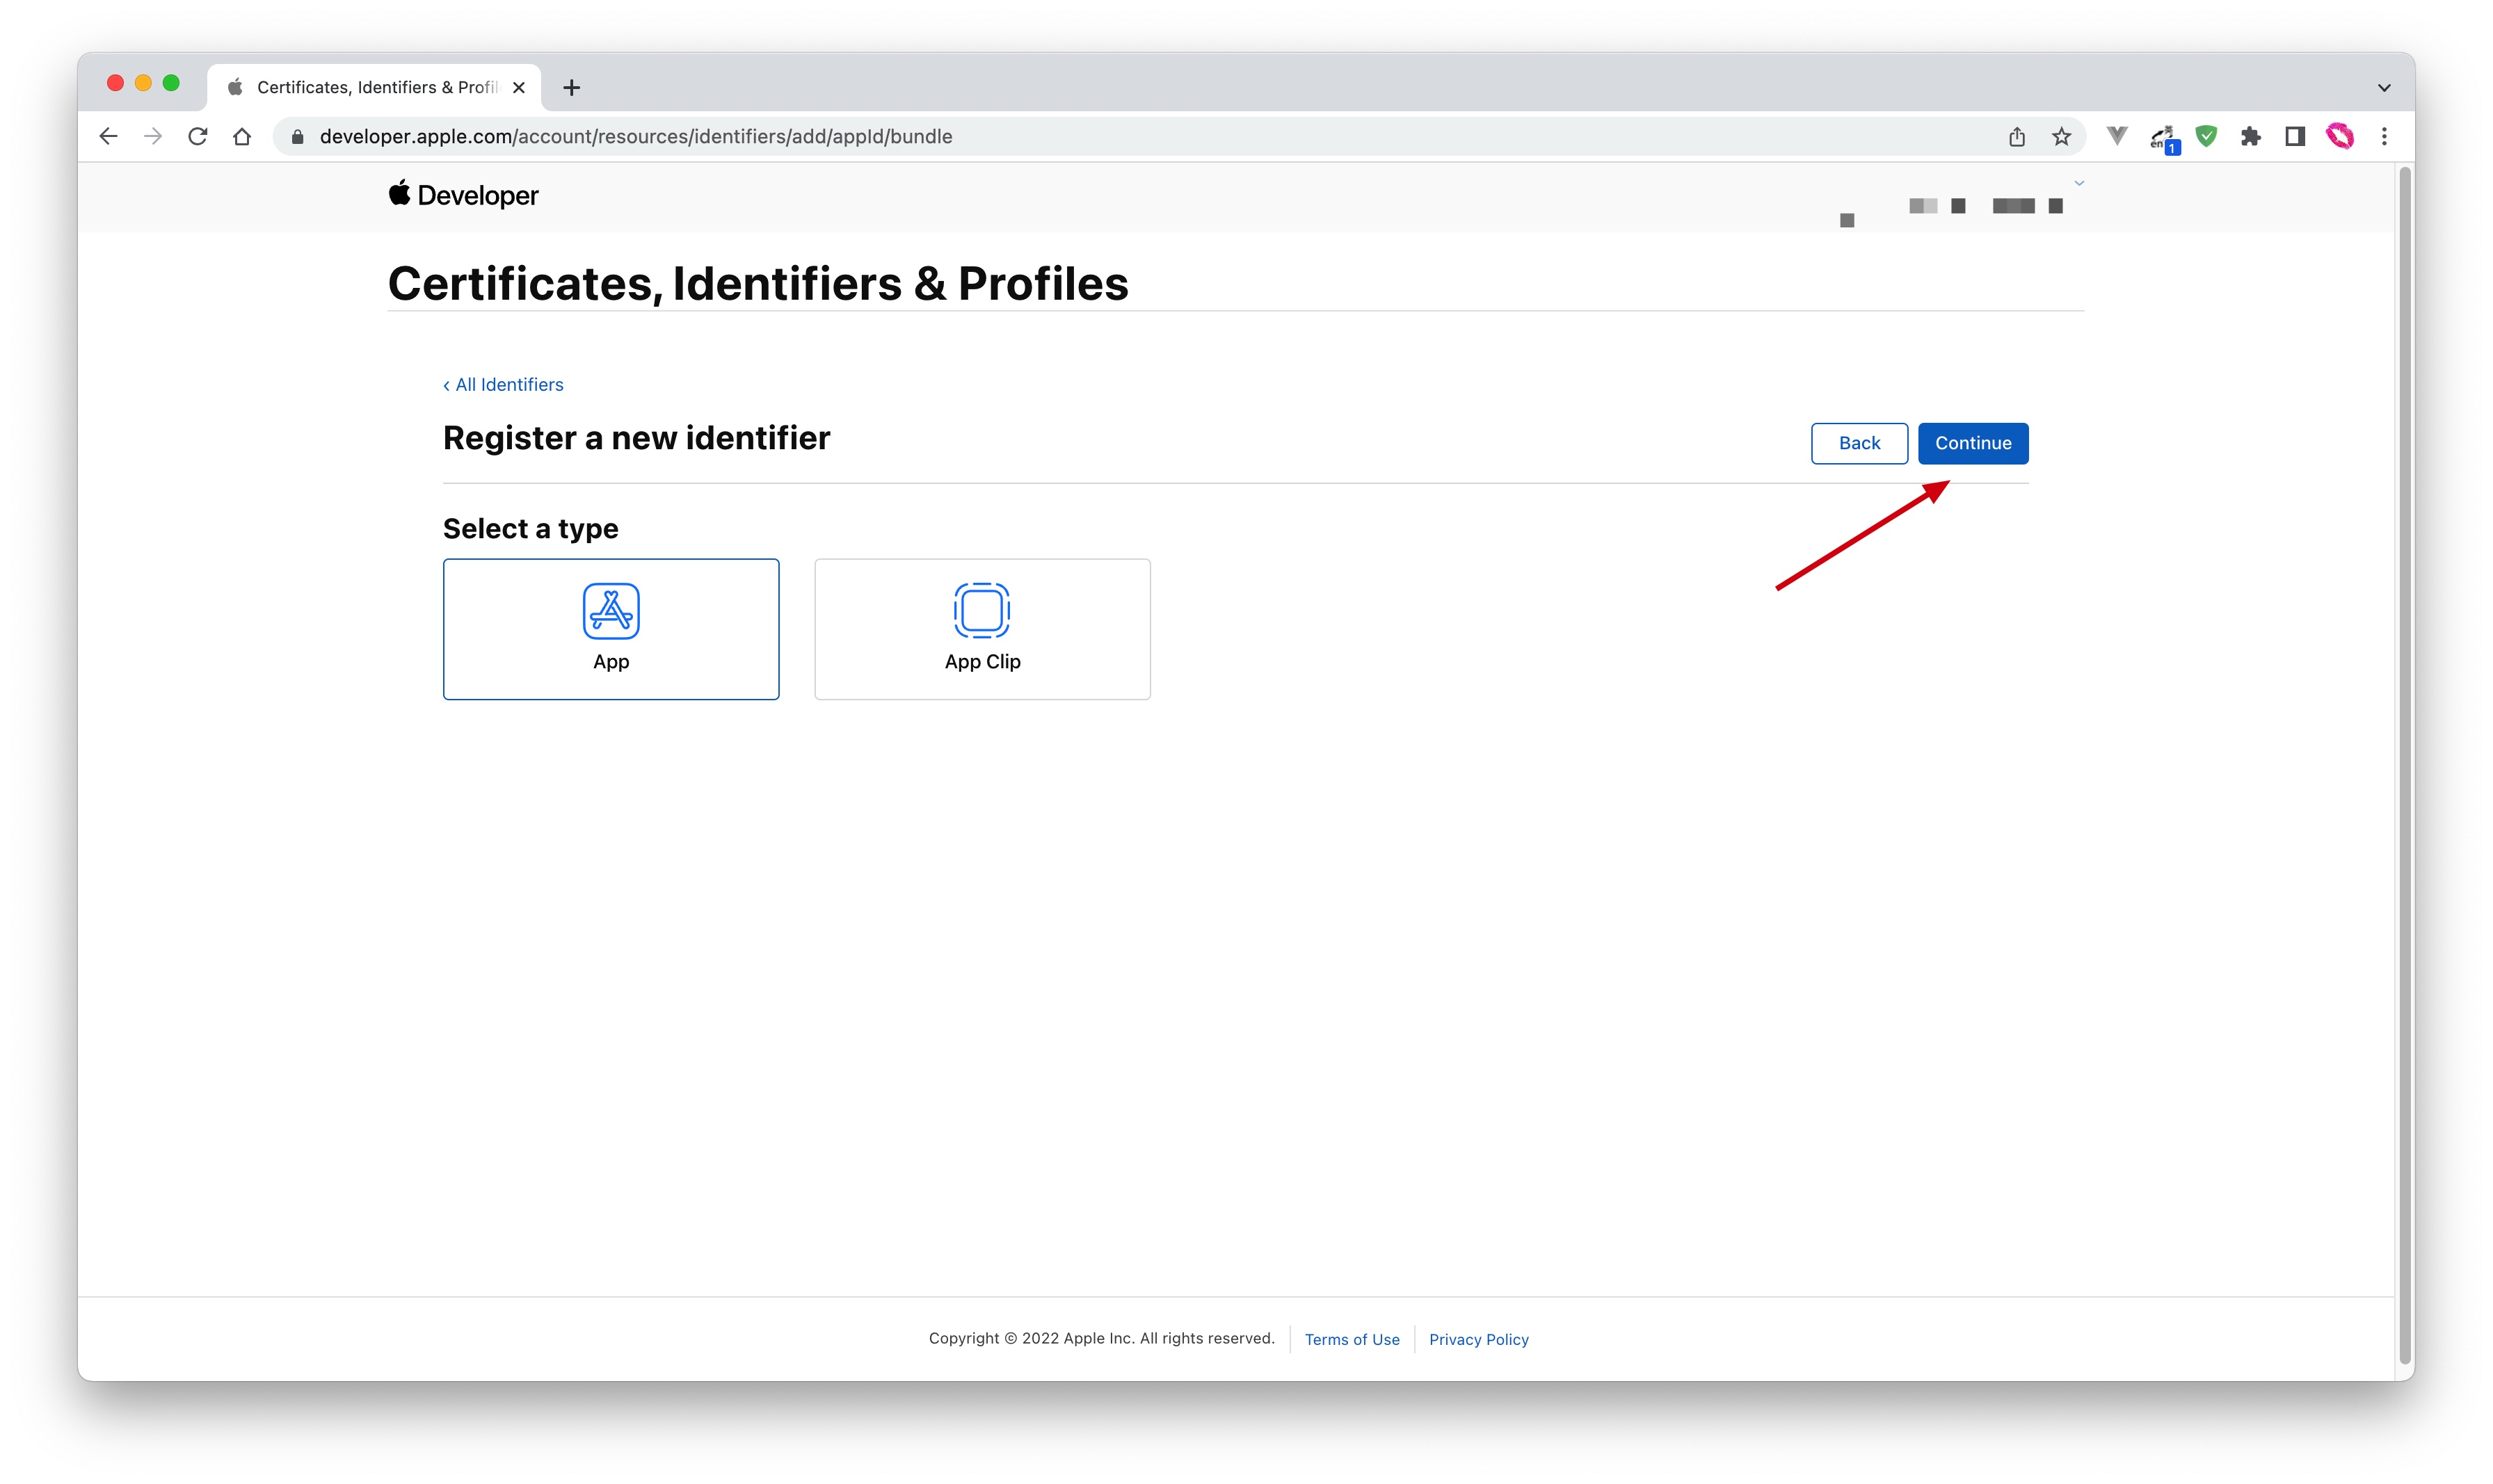
选择应用类型,然后点击 Continue 按钮继续
填写 Description 和 Bundle ID,并且在下面找到 Sign in with Apple 并勾选,请记录下此 Bundle ID
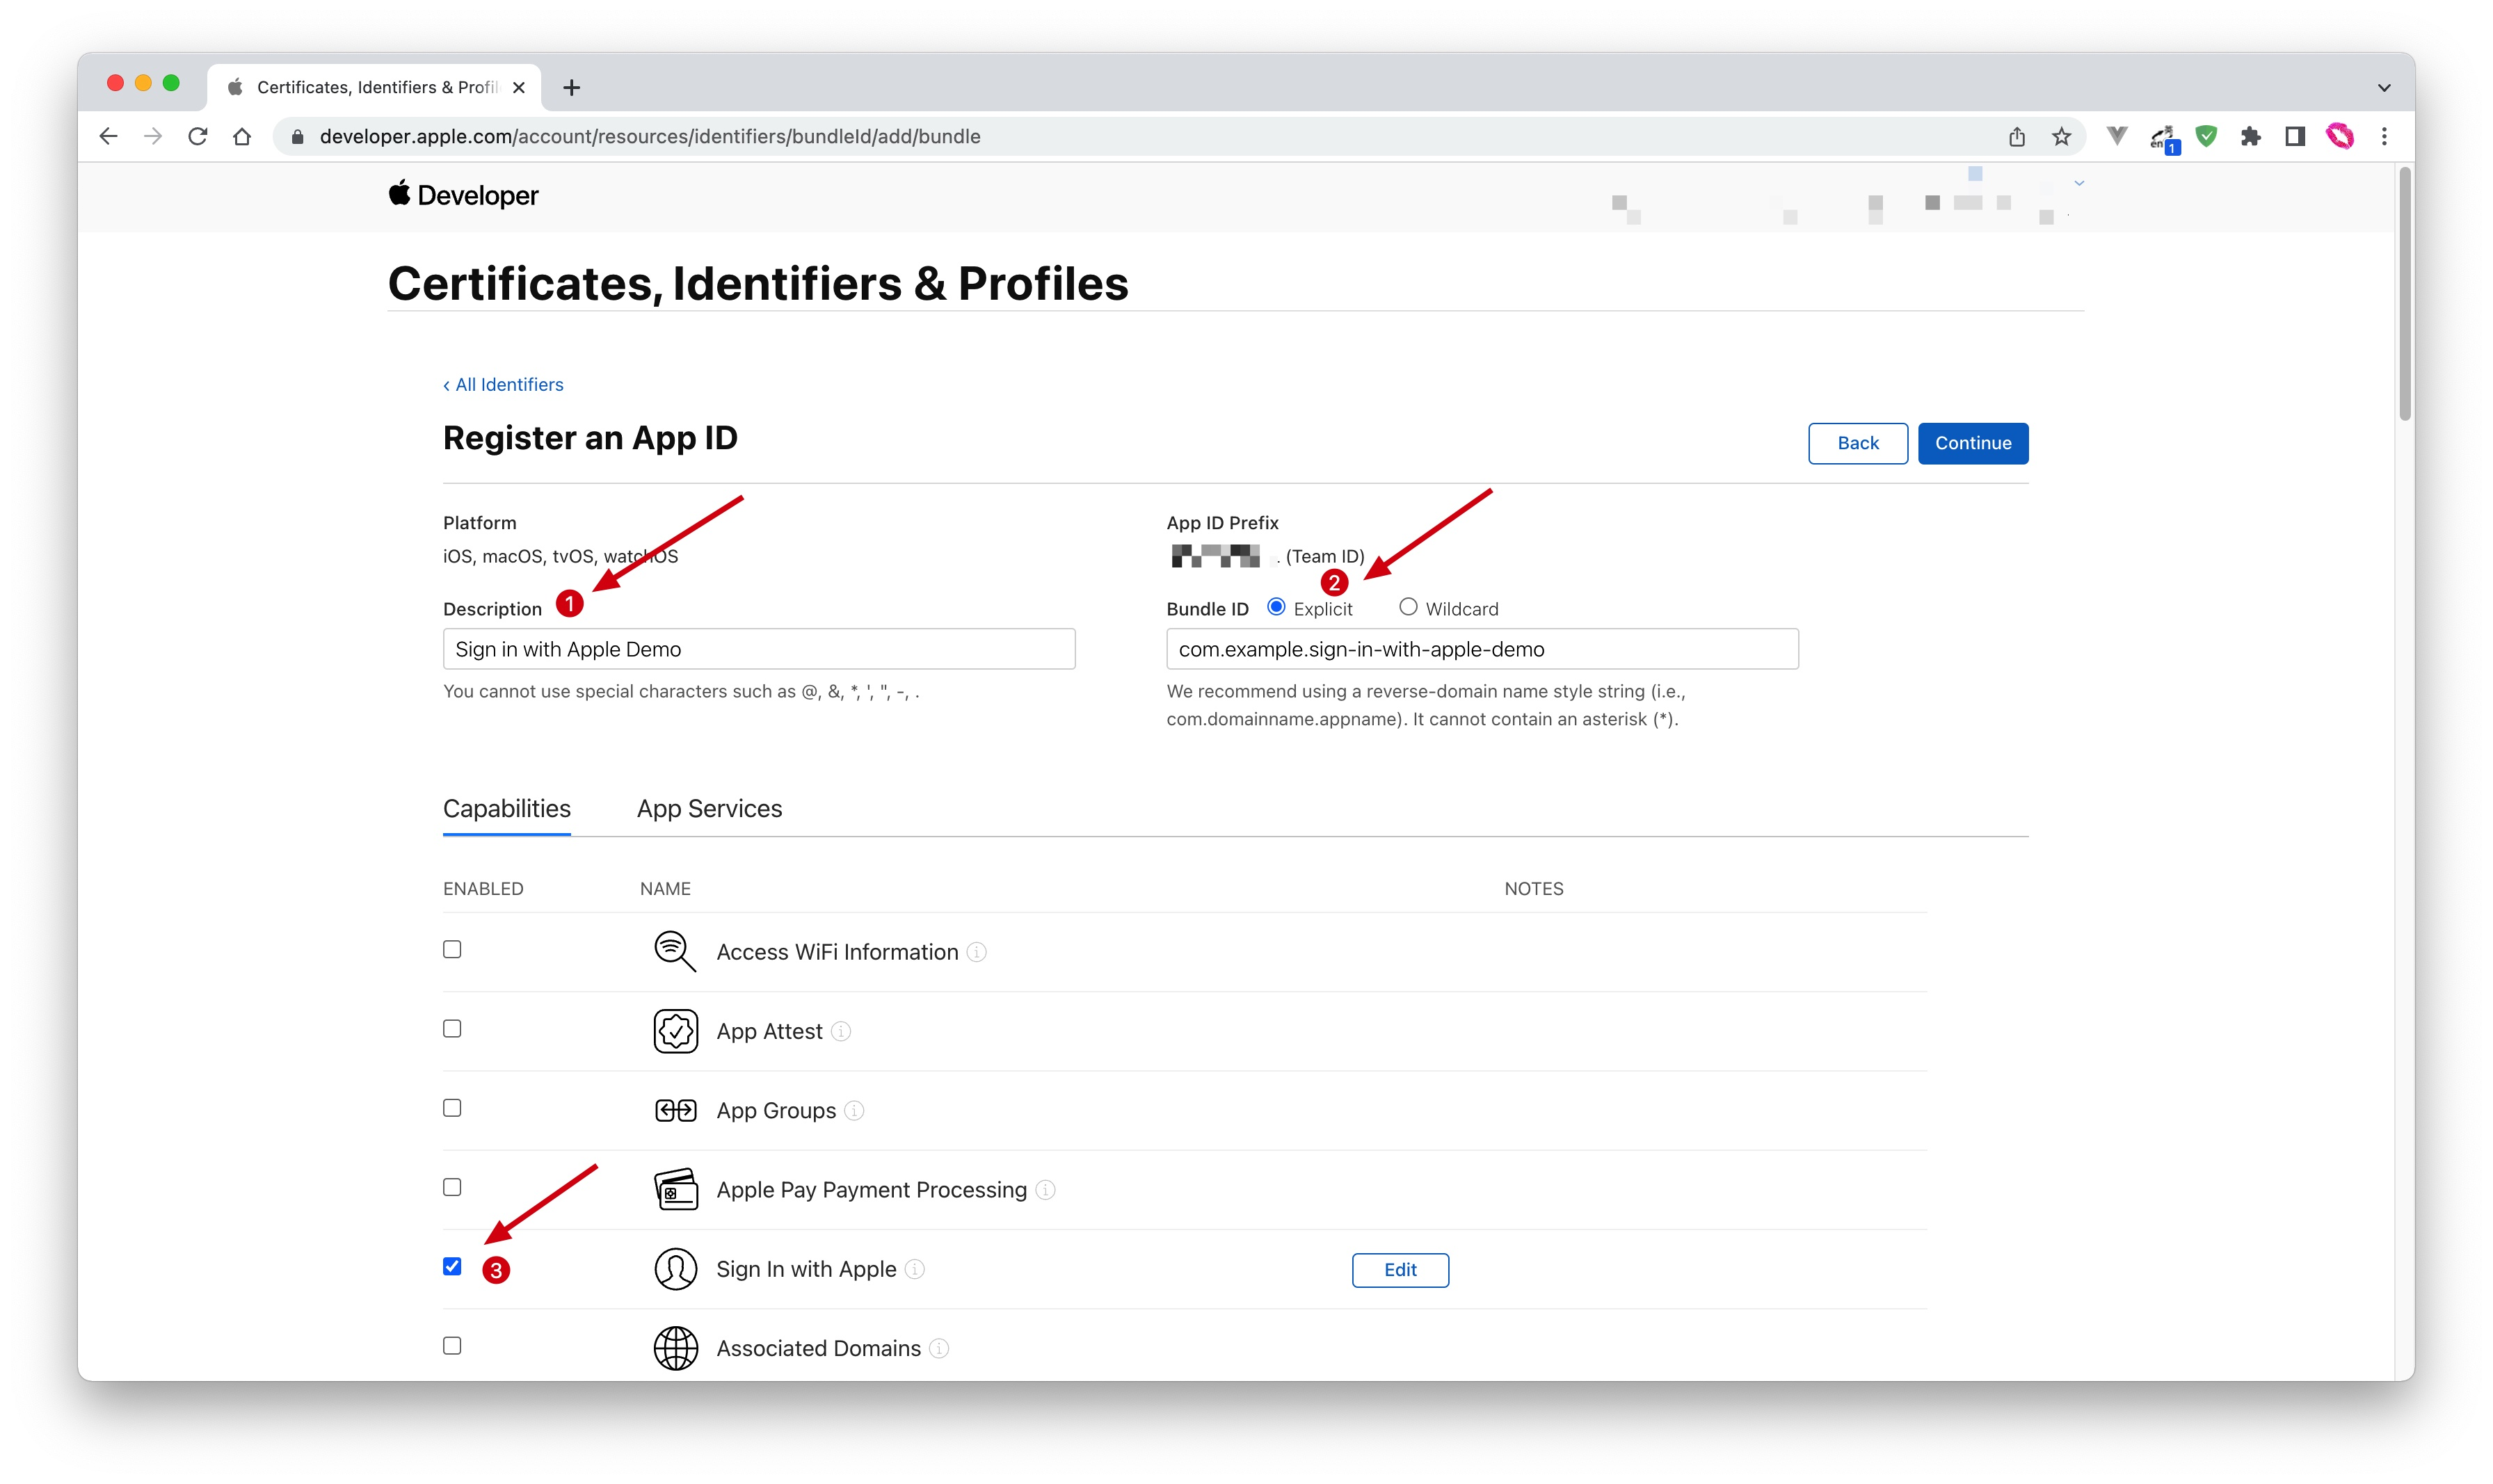
最后点击 Continue 按钮,在打开的页面中确认信息,点击 Register 按钮创建应用。

# 获取 Service ID
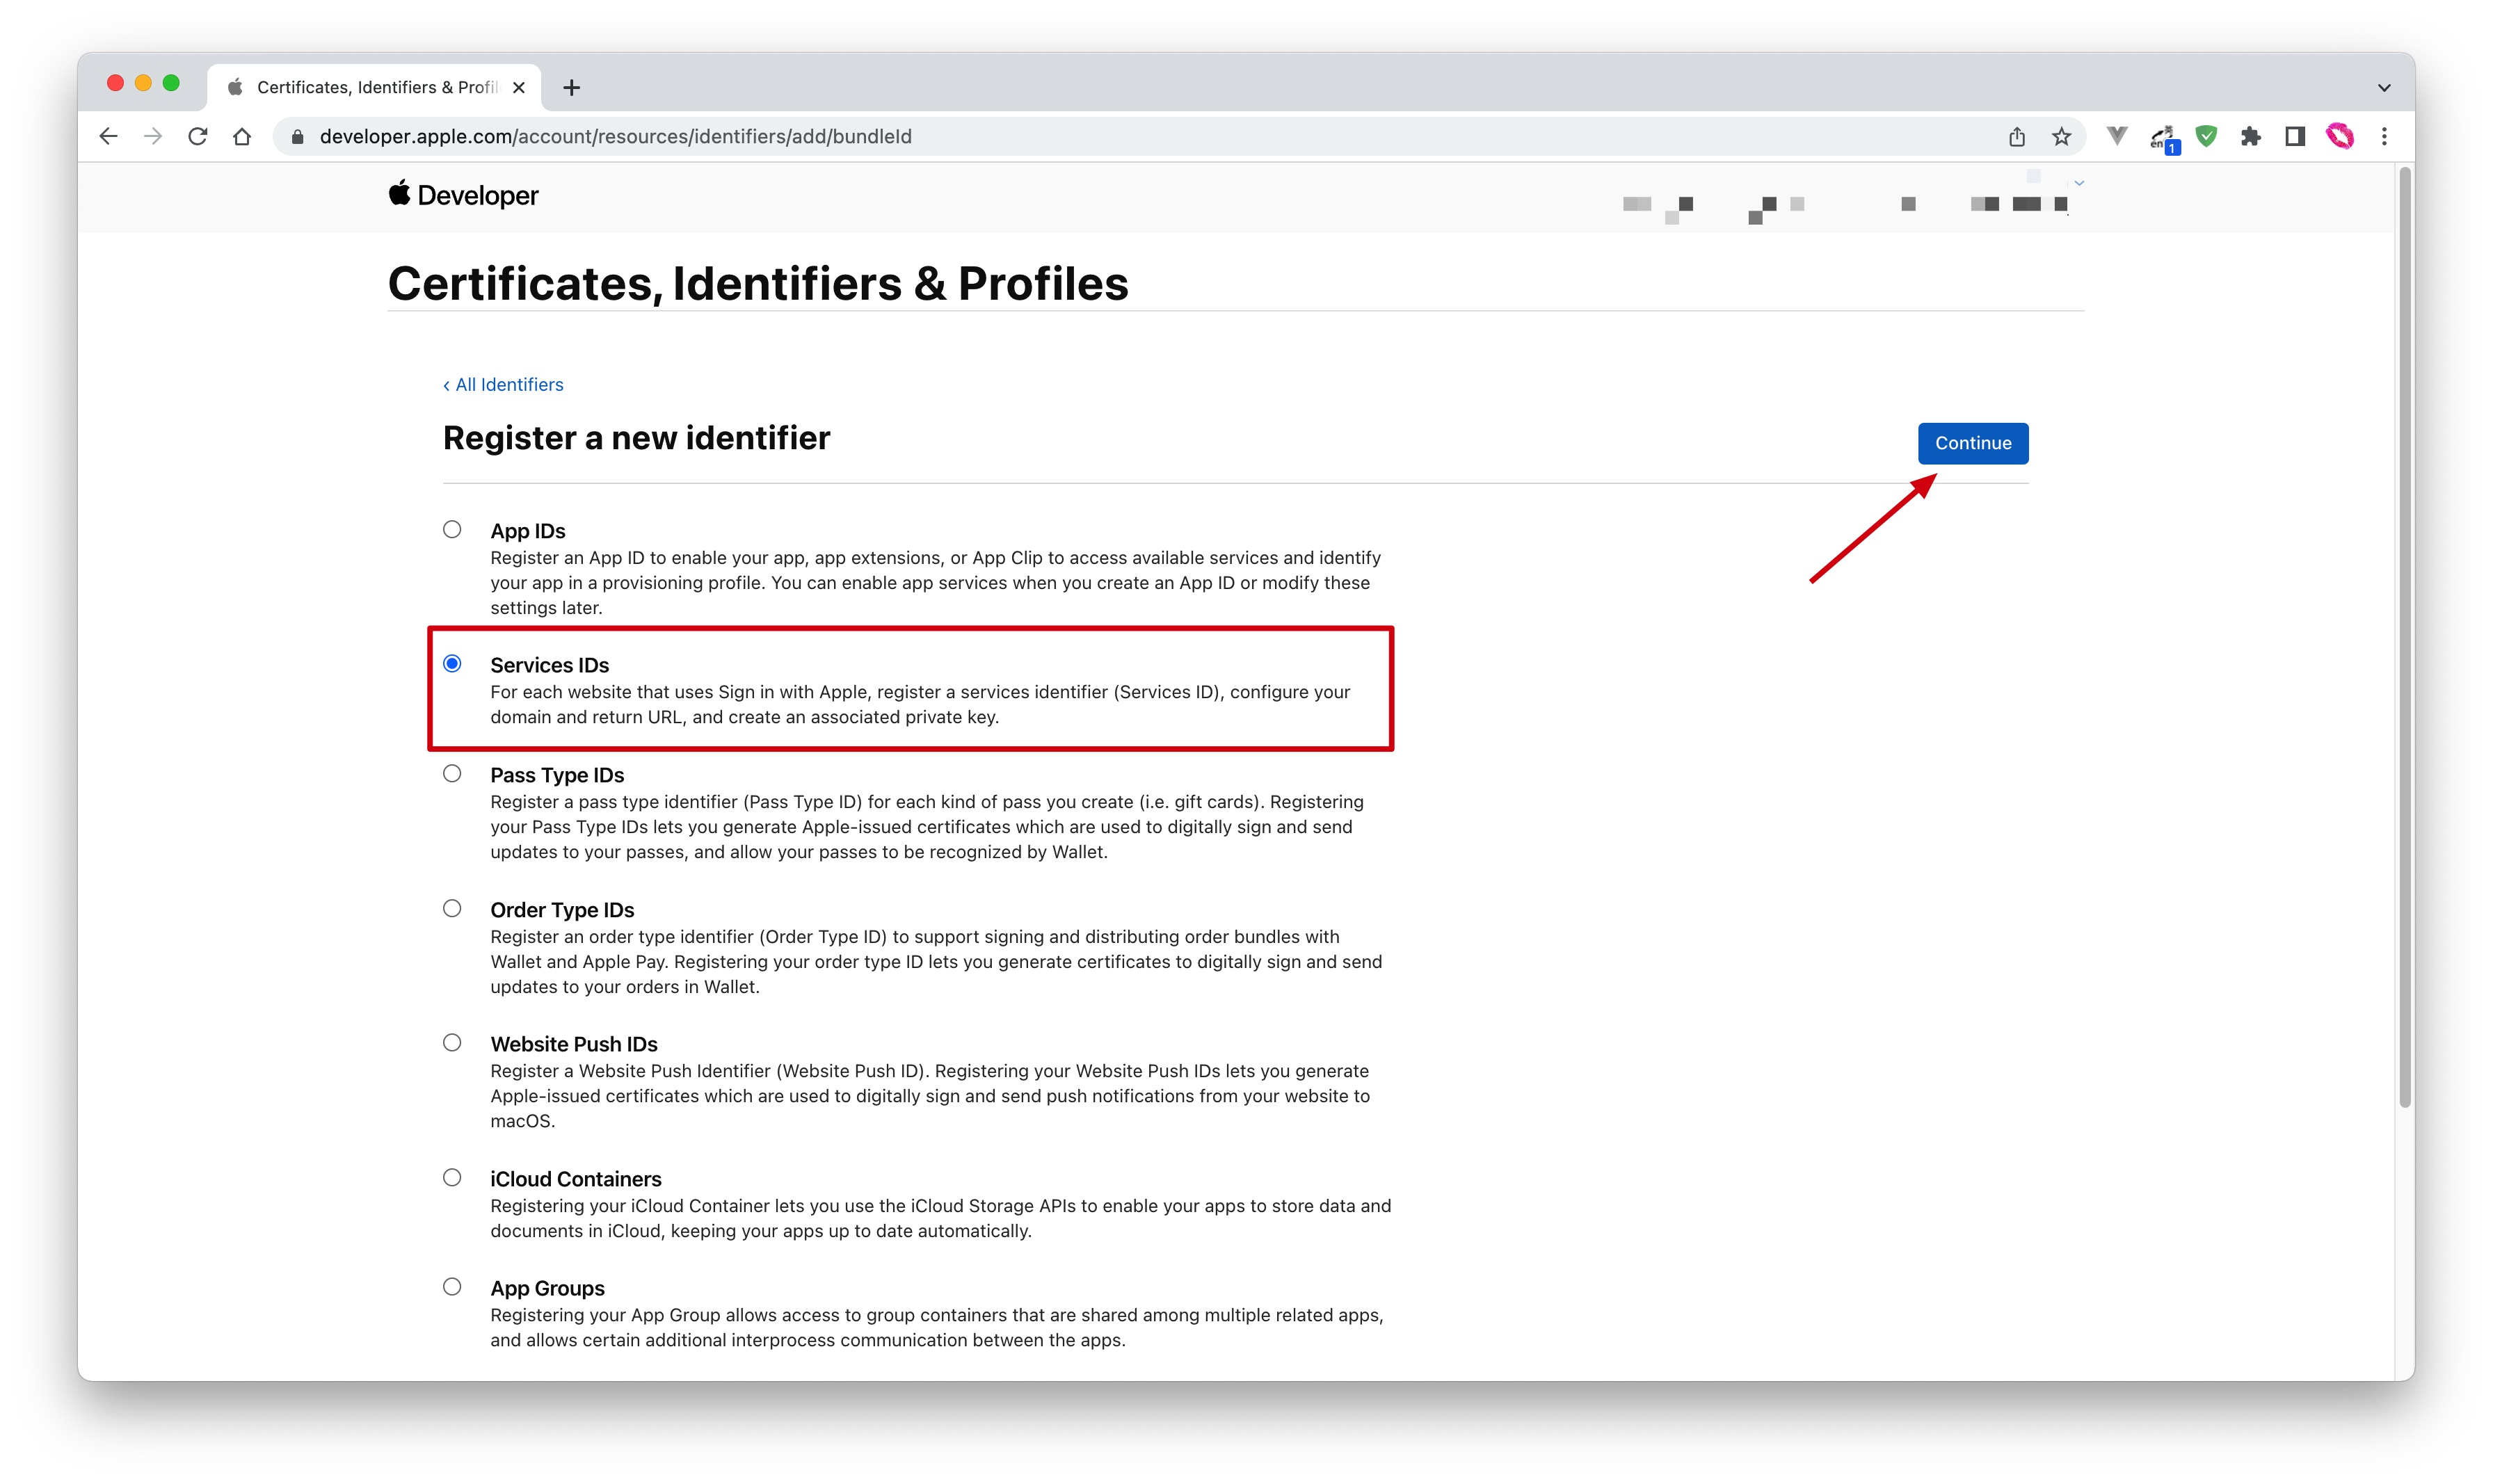
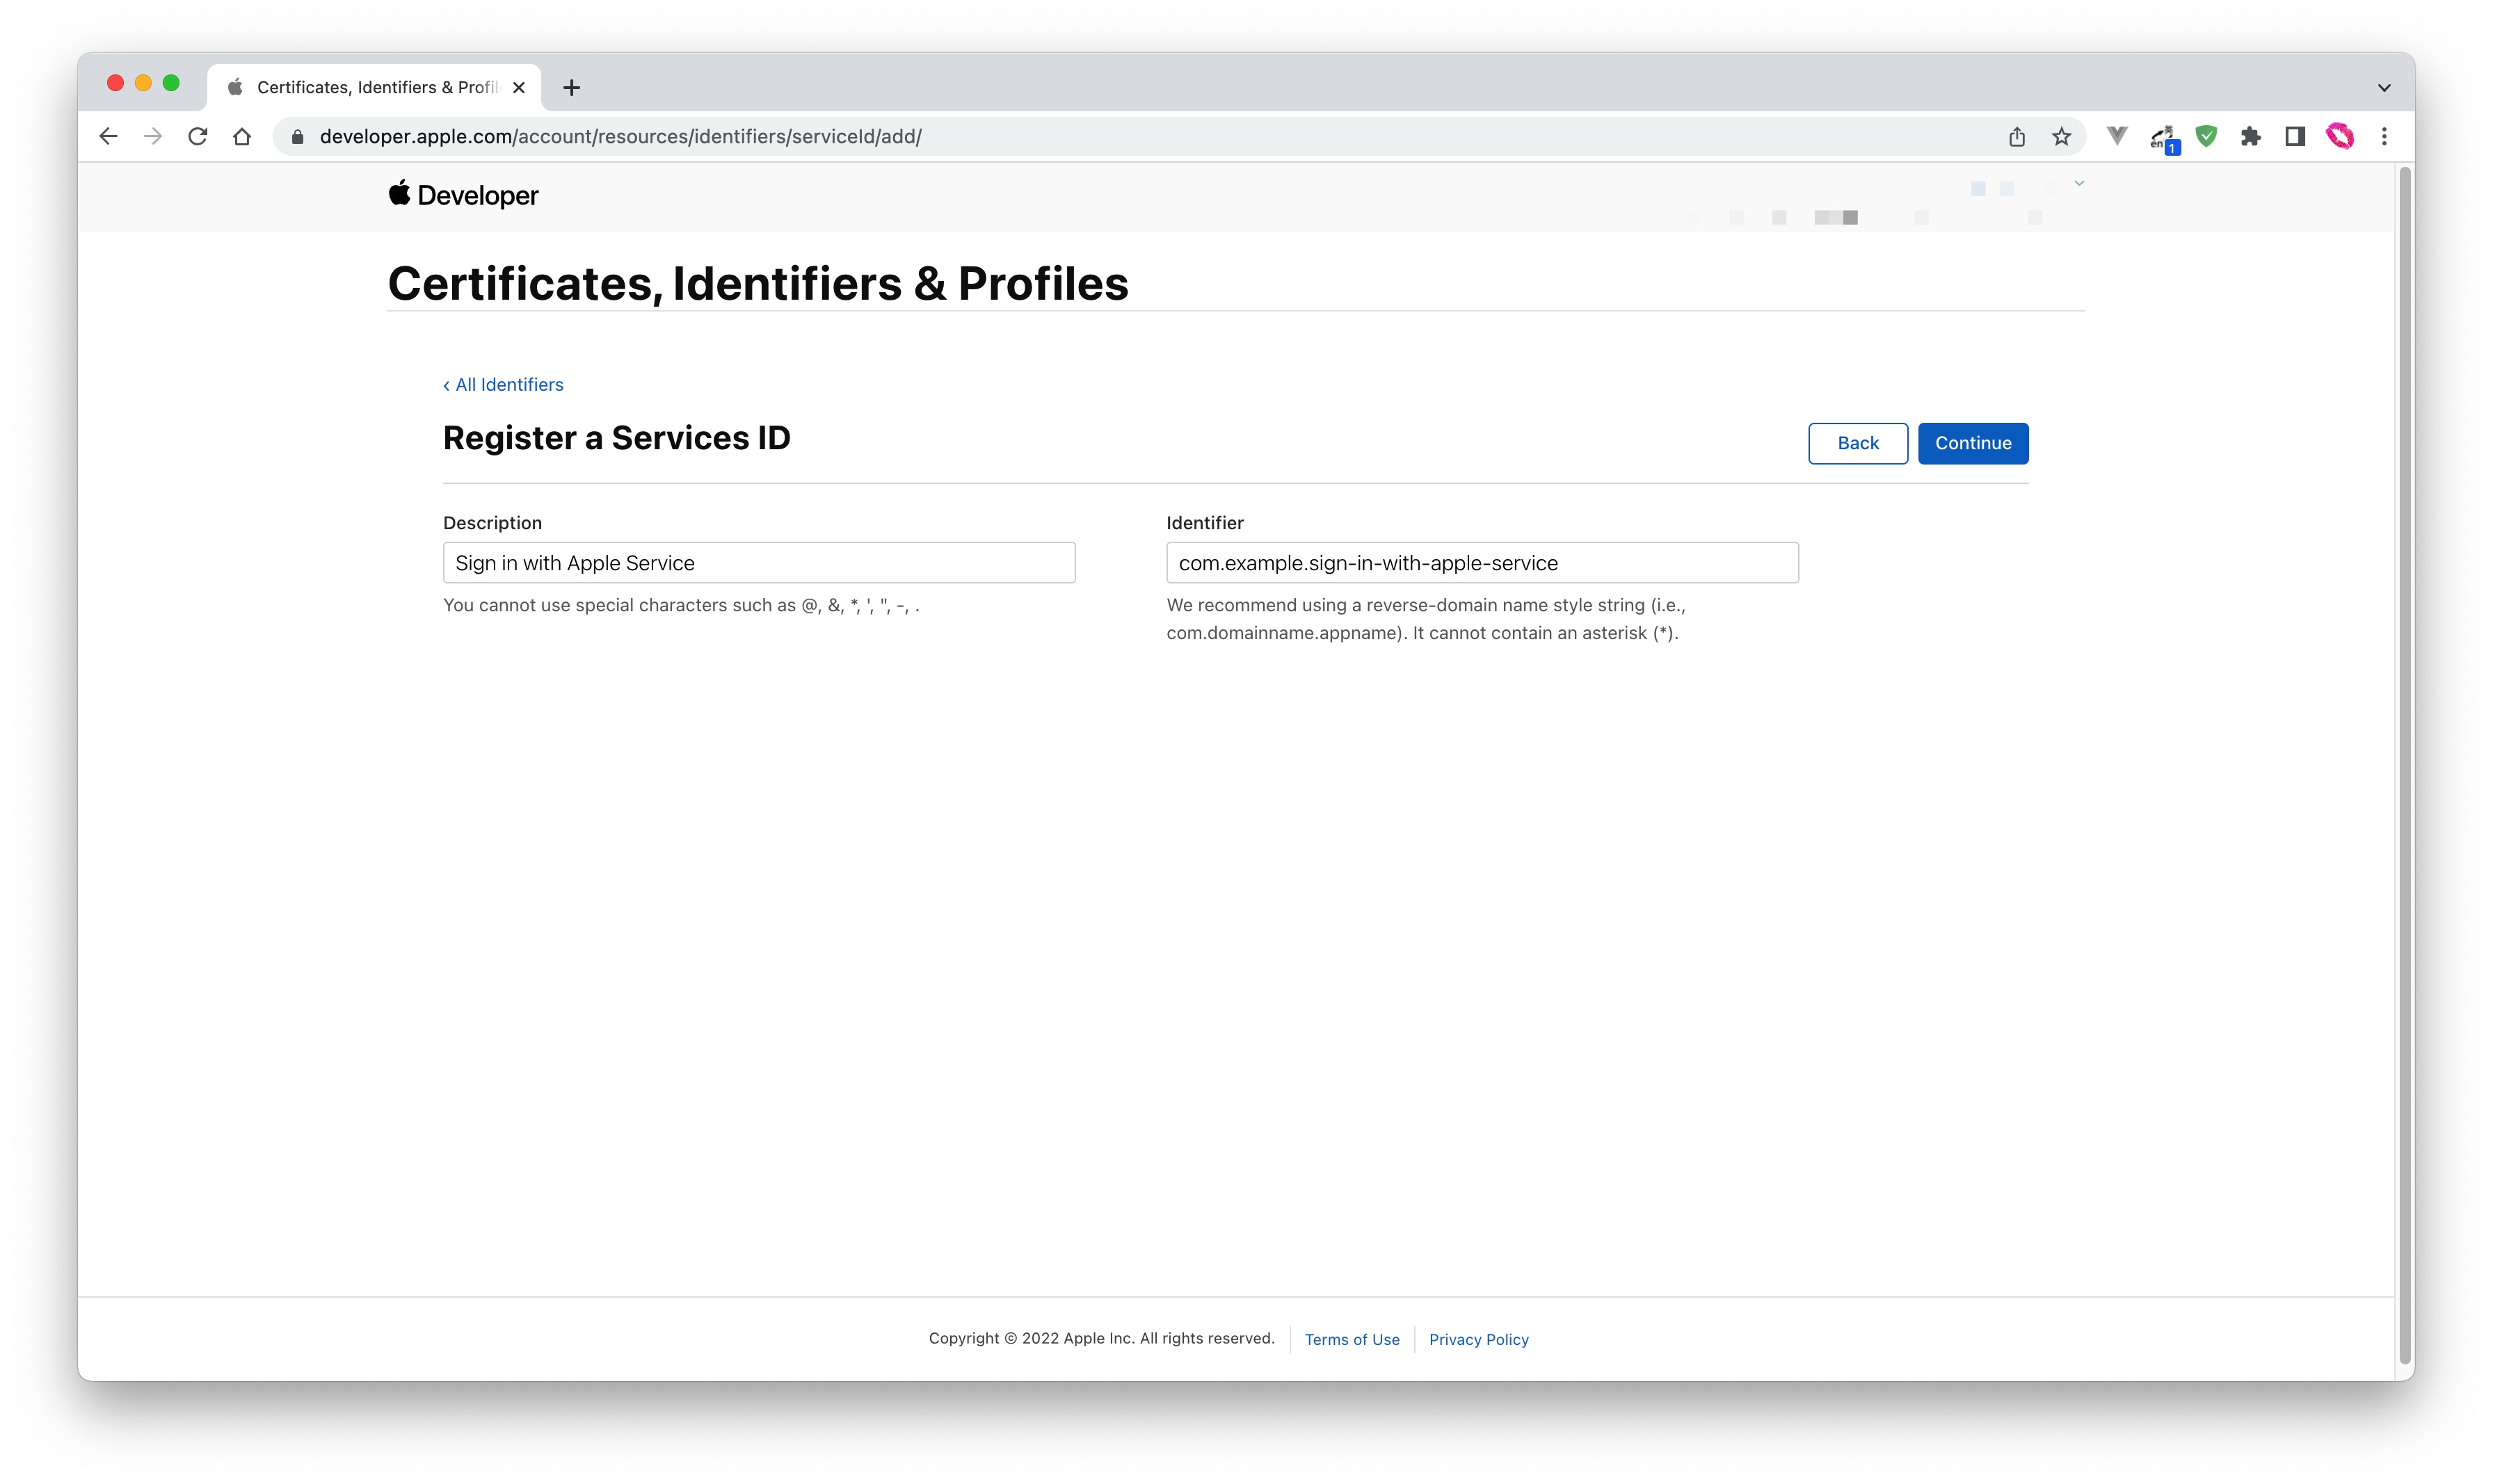
回到 Certificates, Identifiers & Profiles > Identifiers 页面,点击 ➕ 图标,选择 Services IDs 然后点击 Continue 按钮继续:
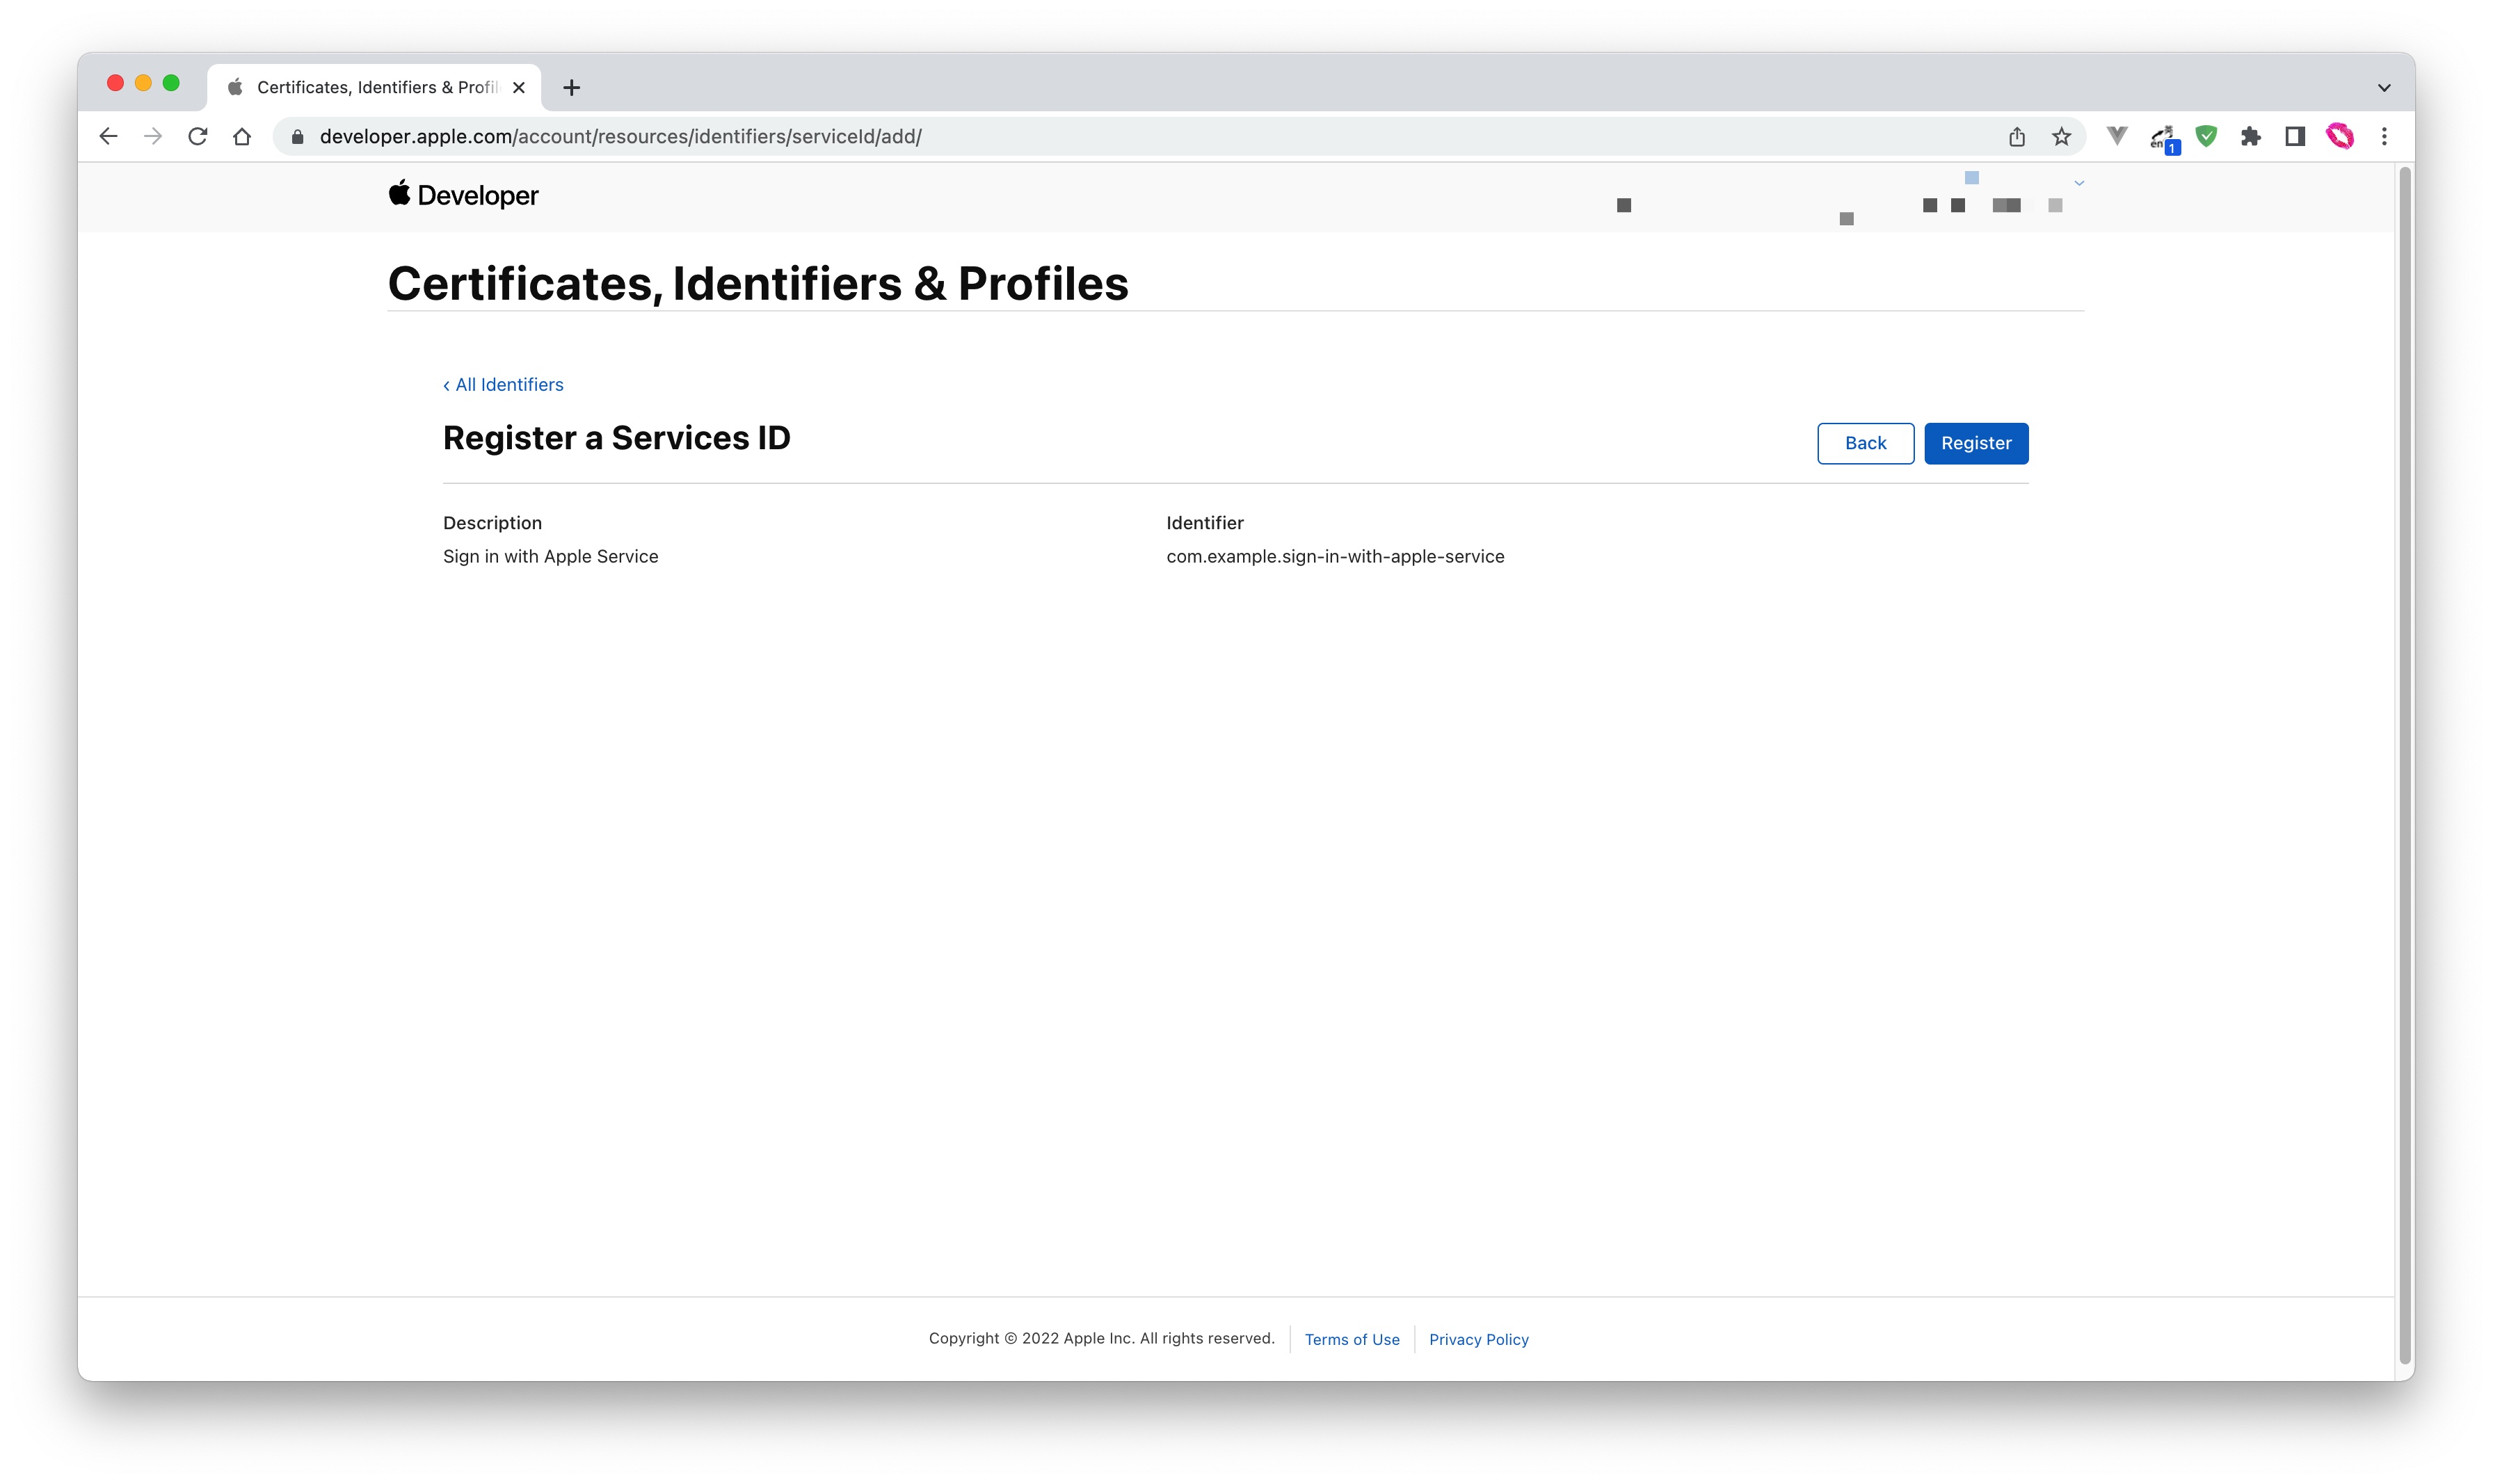
填写 Description 和 Identifier,然后点击 Continue 按钮,在打开的确认页面点击 Register 按钮创建 Service:
找到刚刚创建的 Service,选中 Sign In with Apple,点击 Configure
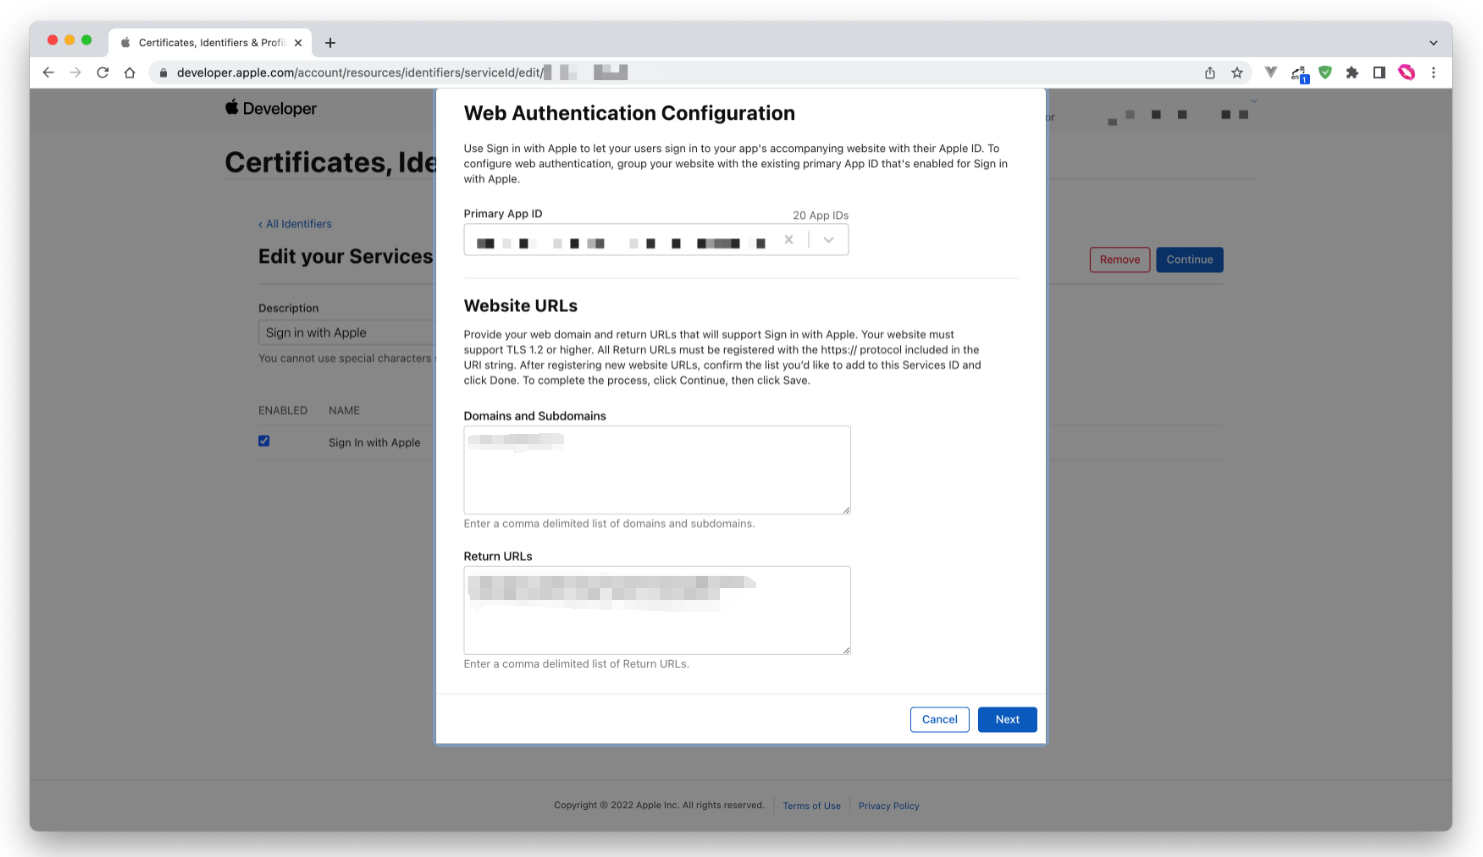
填写 Domains and Subdomains 和 Return URLs:
- Domains and Subdomains:不包含协议的域名,比如
justauth.cn,不支持localhost - Return URLs:回调地址,不支持
localhost
点击 Save,Continue,最后点击 Register,并记录下该 Service ID。
# 配置 Signing Key
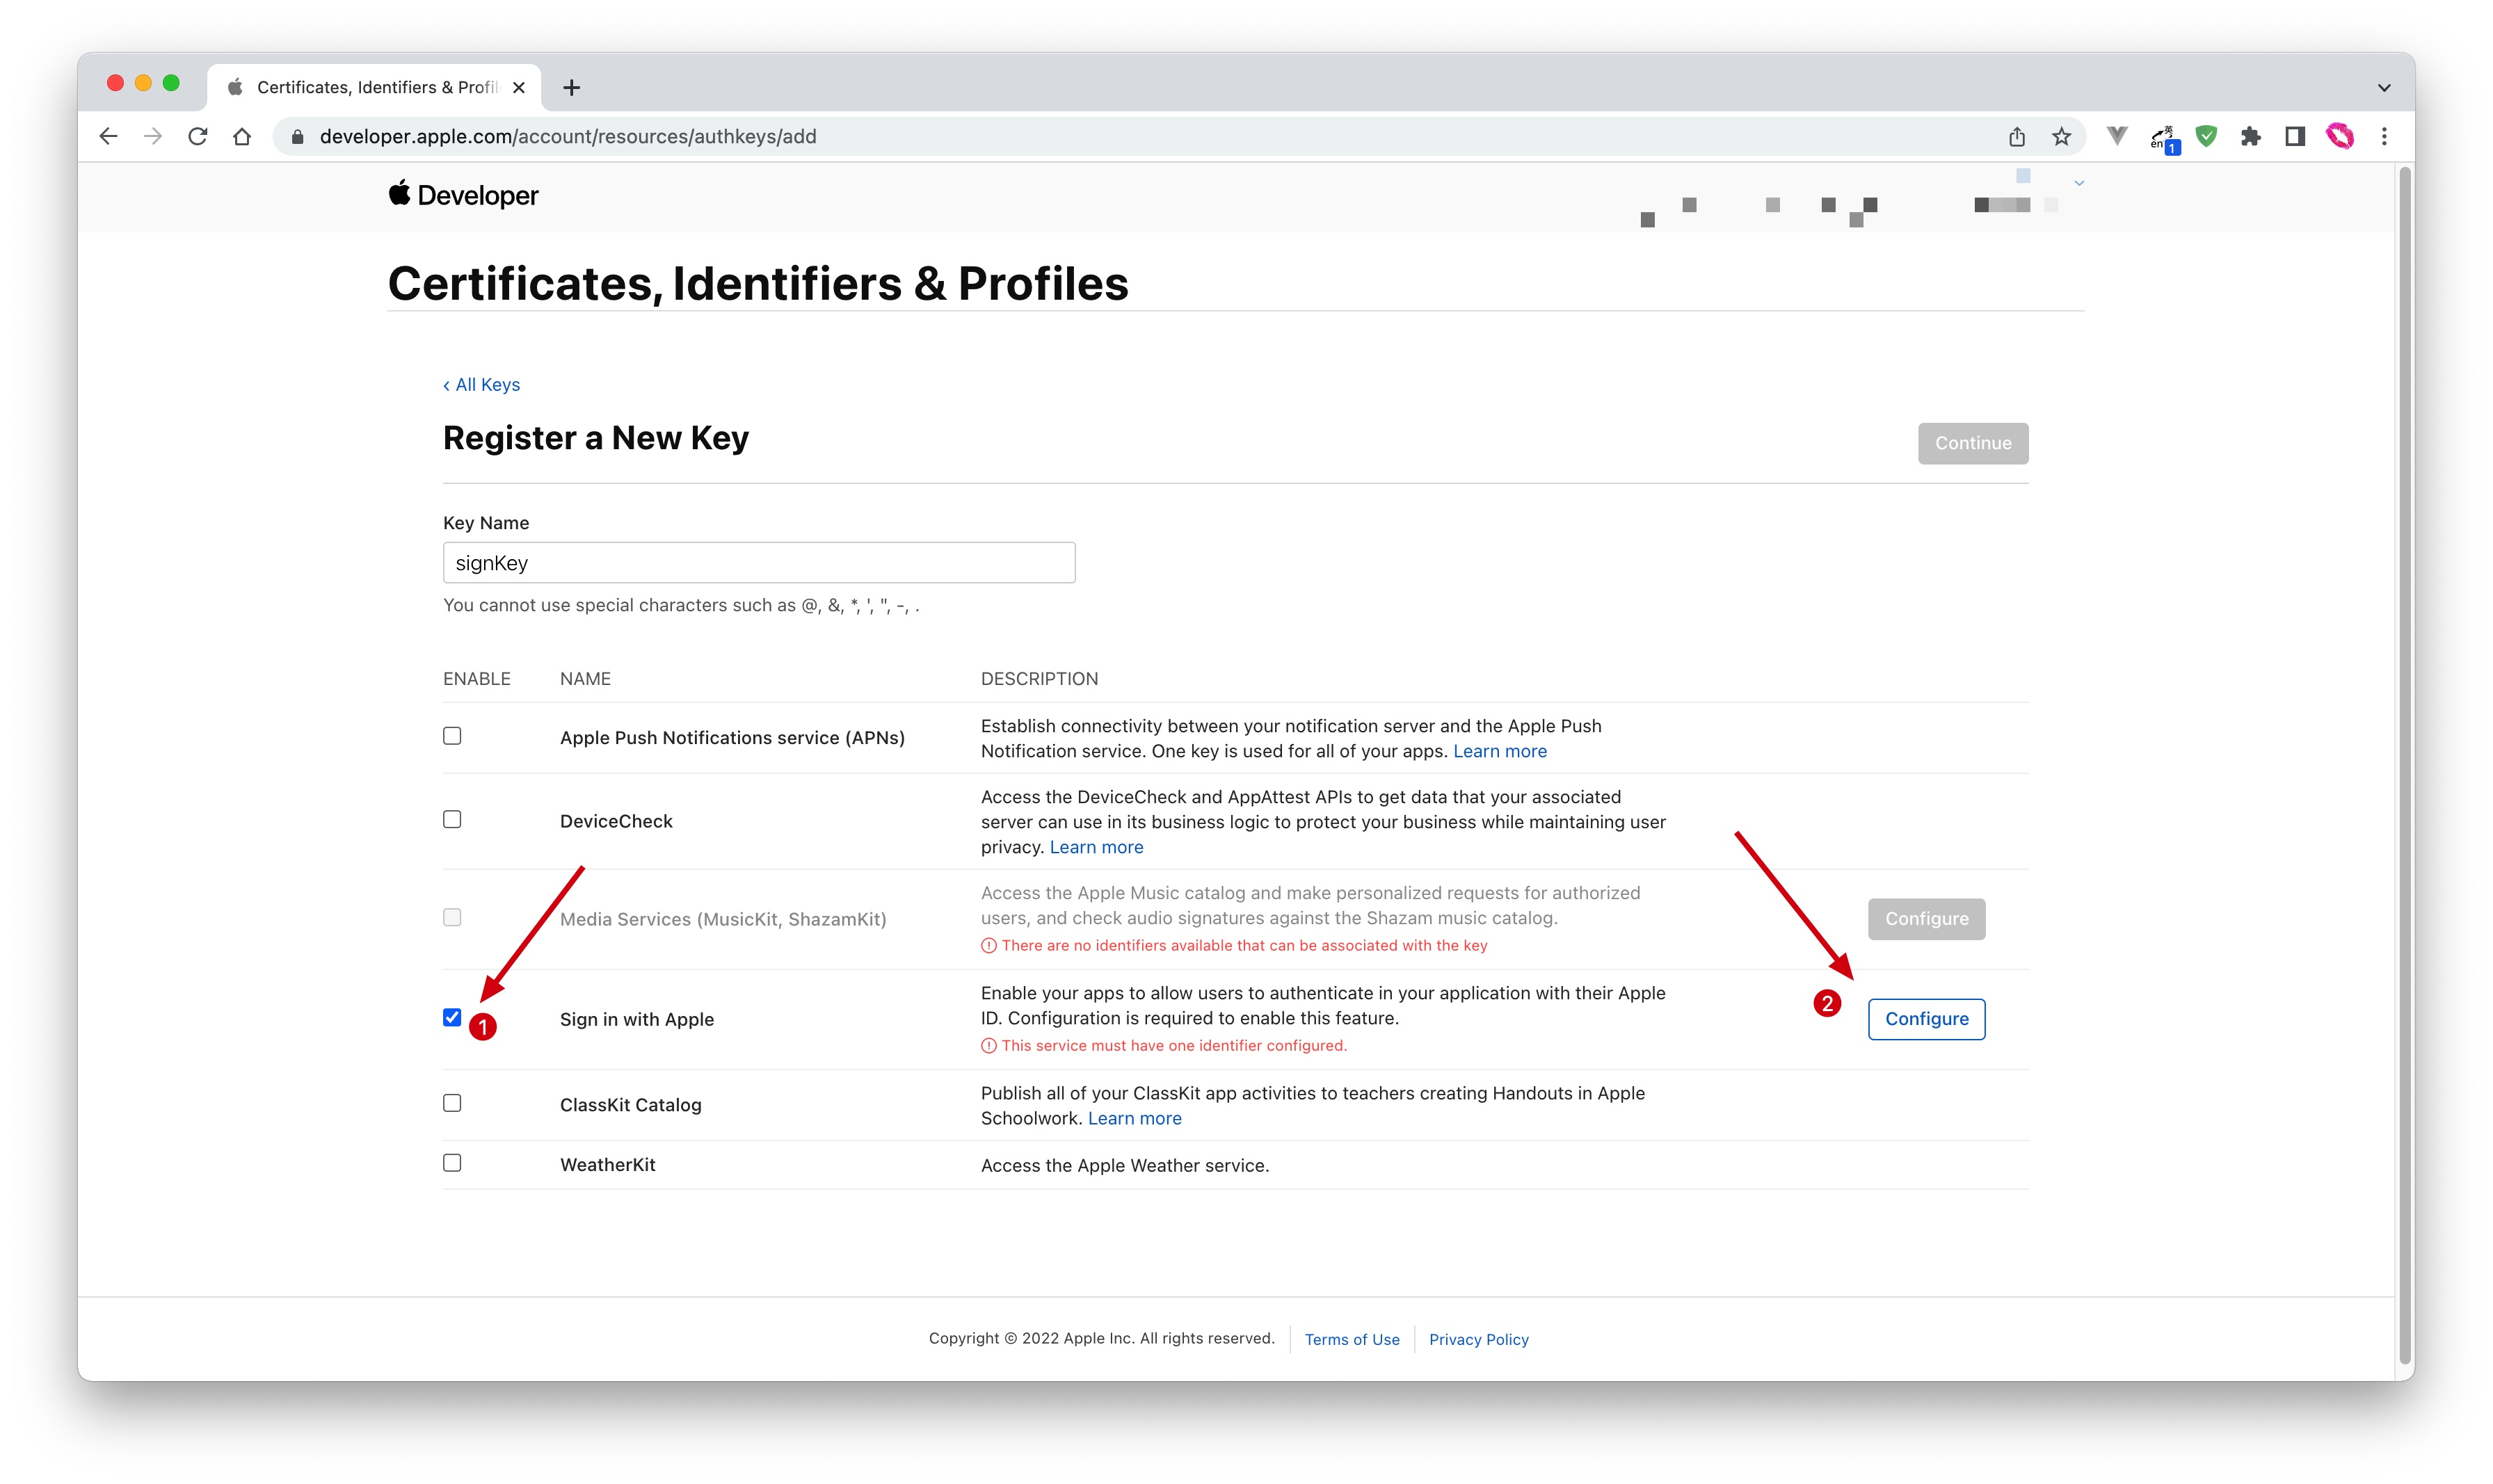
回到 Certificates, Identifiers & Profiles 页面,切换到 Keys Tab,点击 ➕ 图标
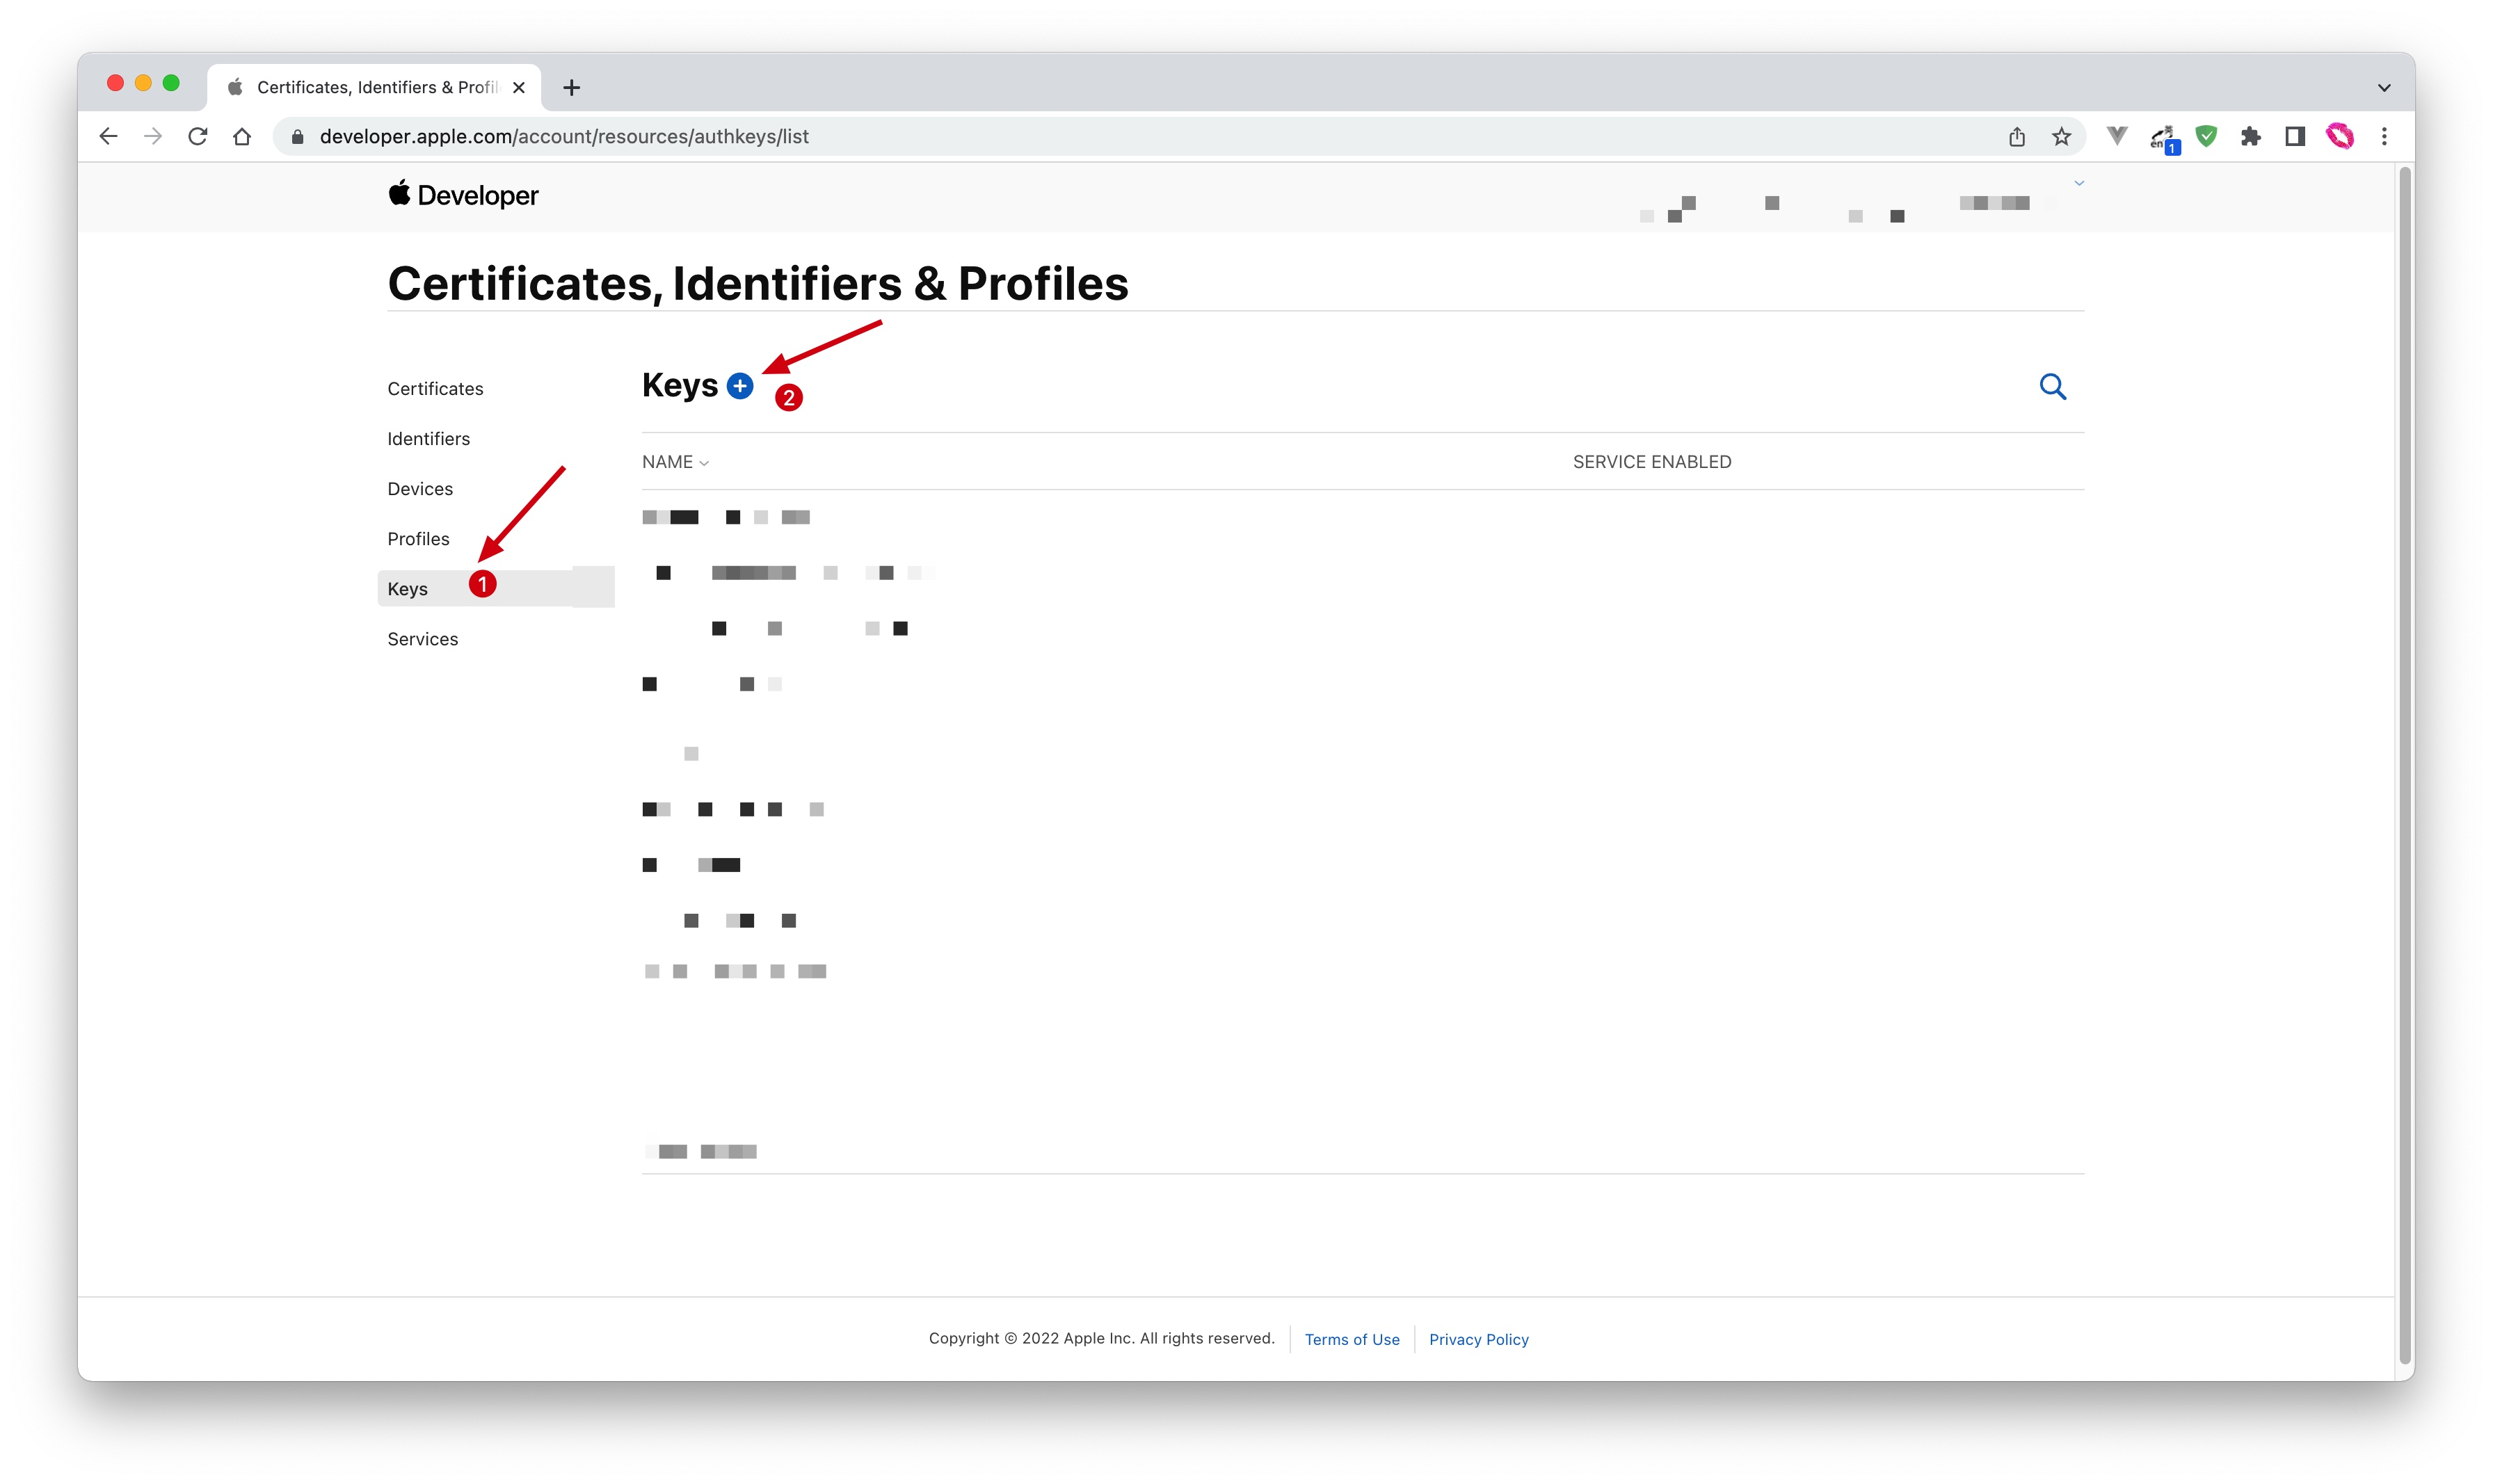
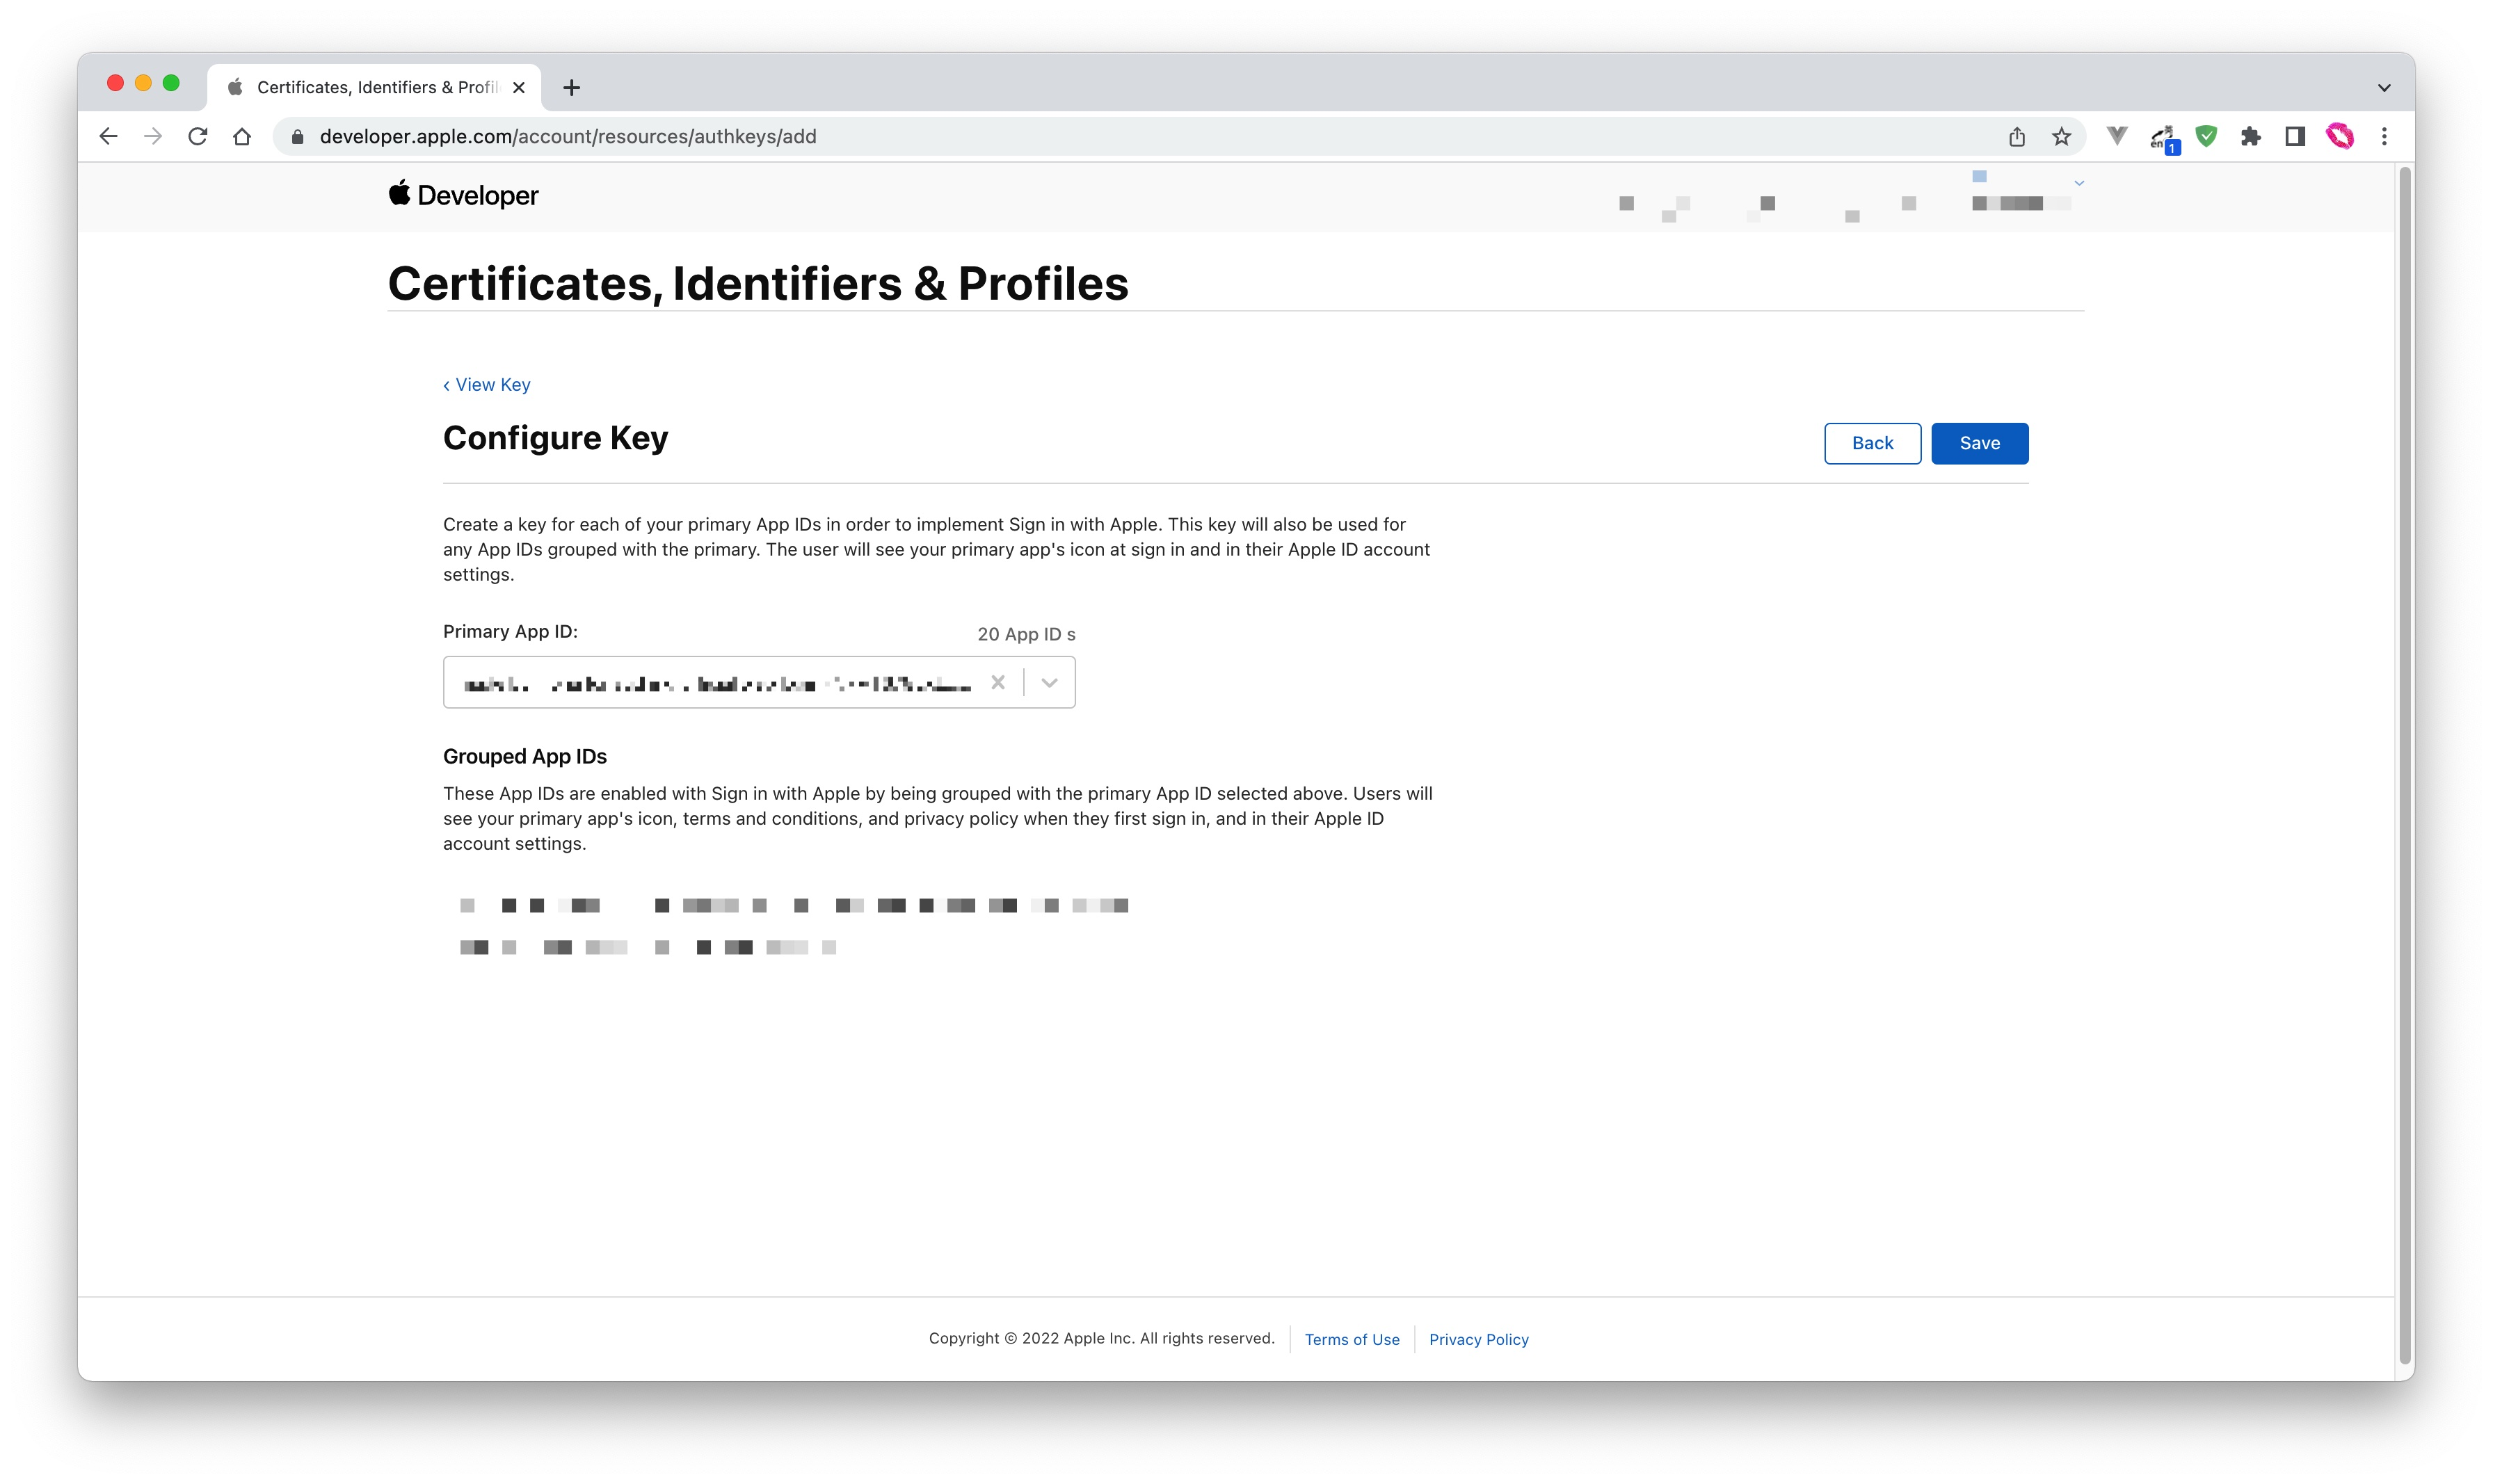
输入名称并勾选上 Sign in with Apple, 点击 Configure,确保选中的 Primary App ID 是你刚刚创建的那一个:
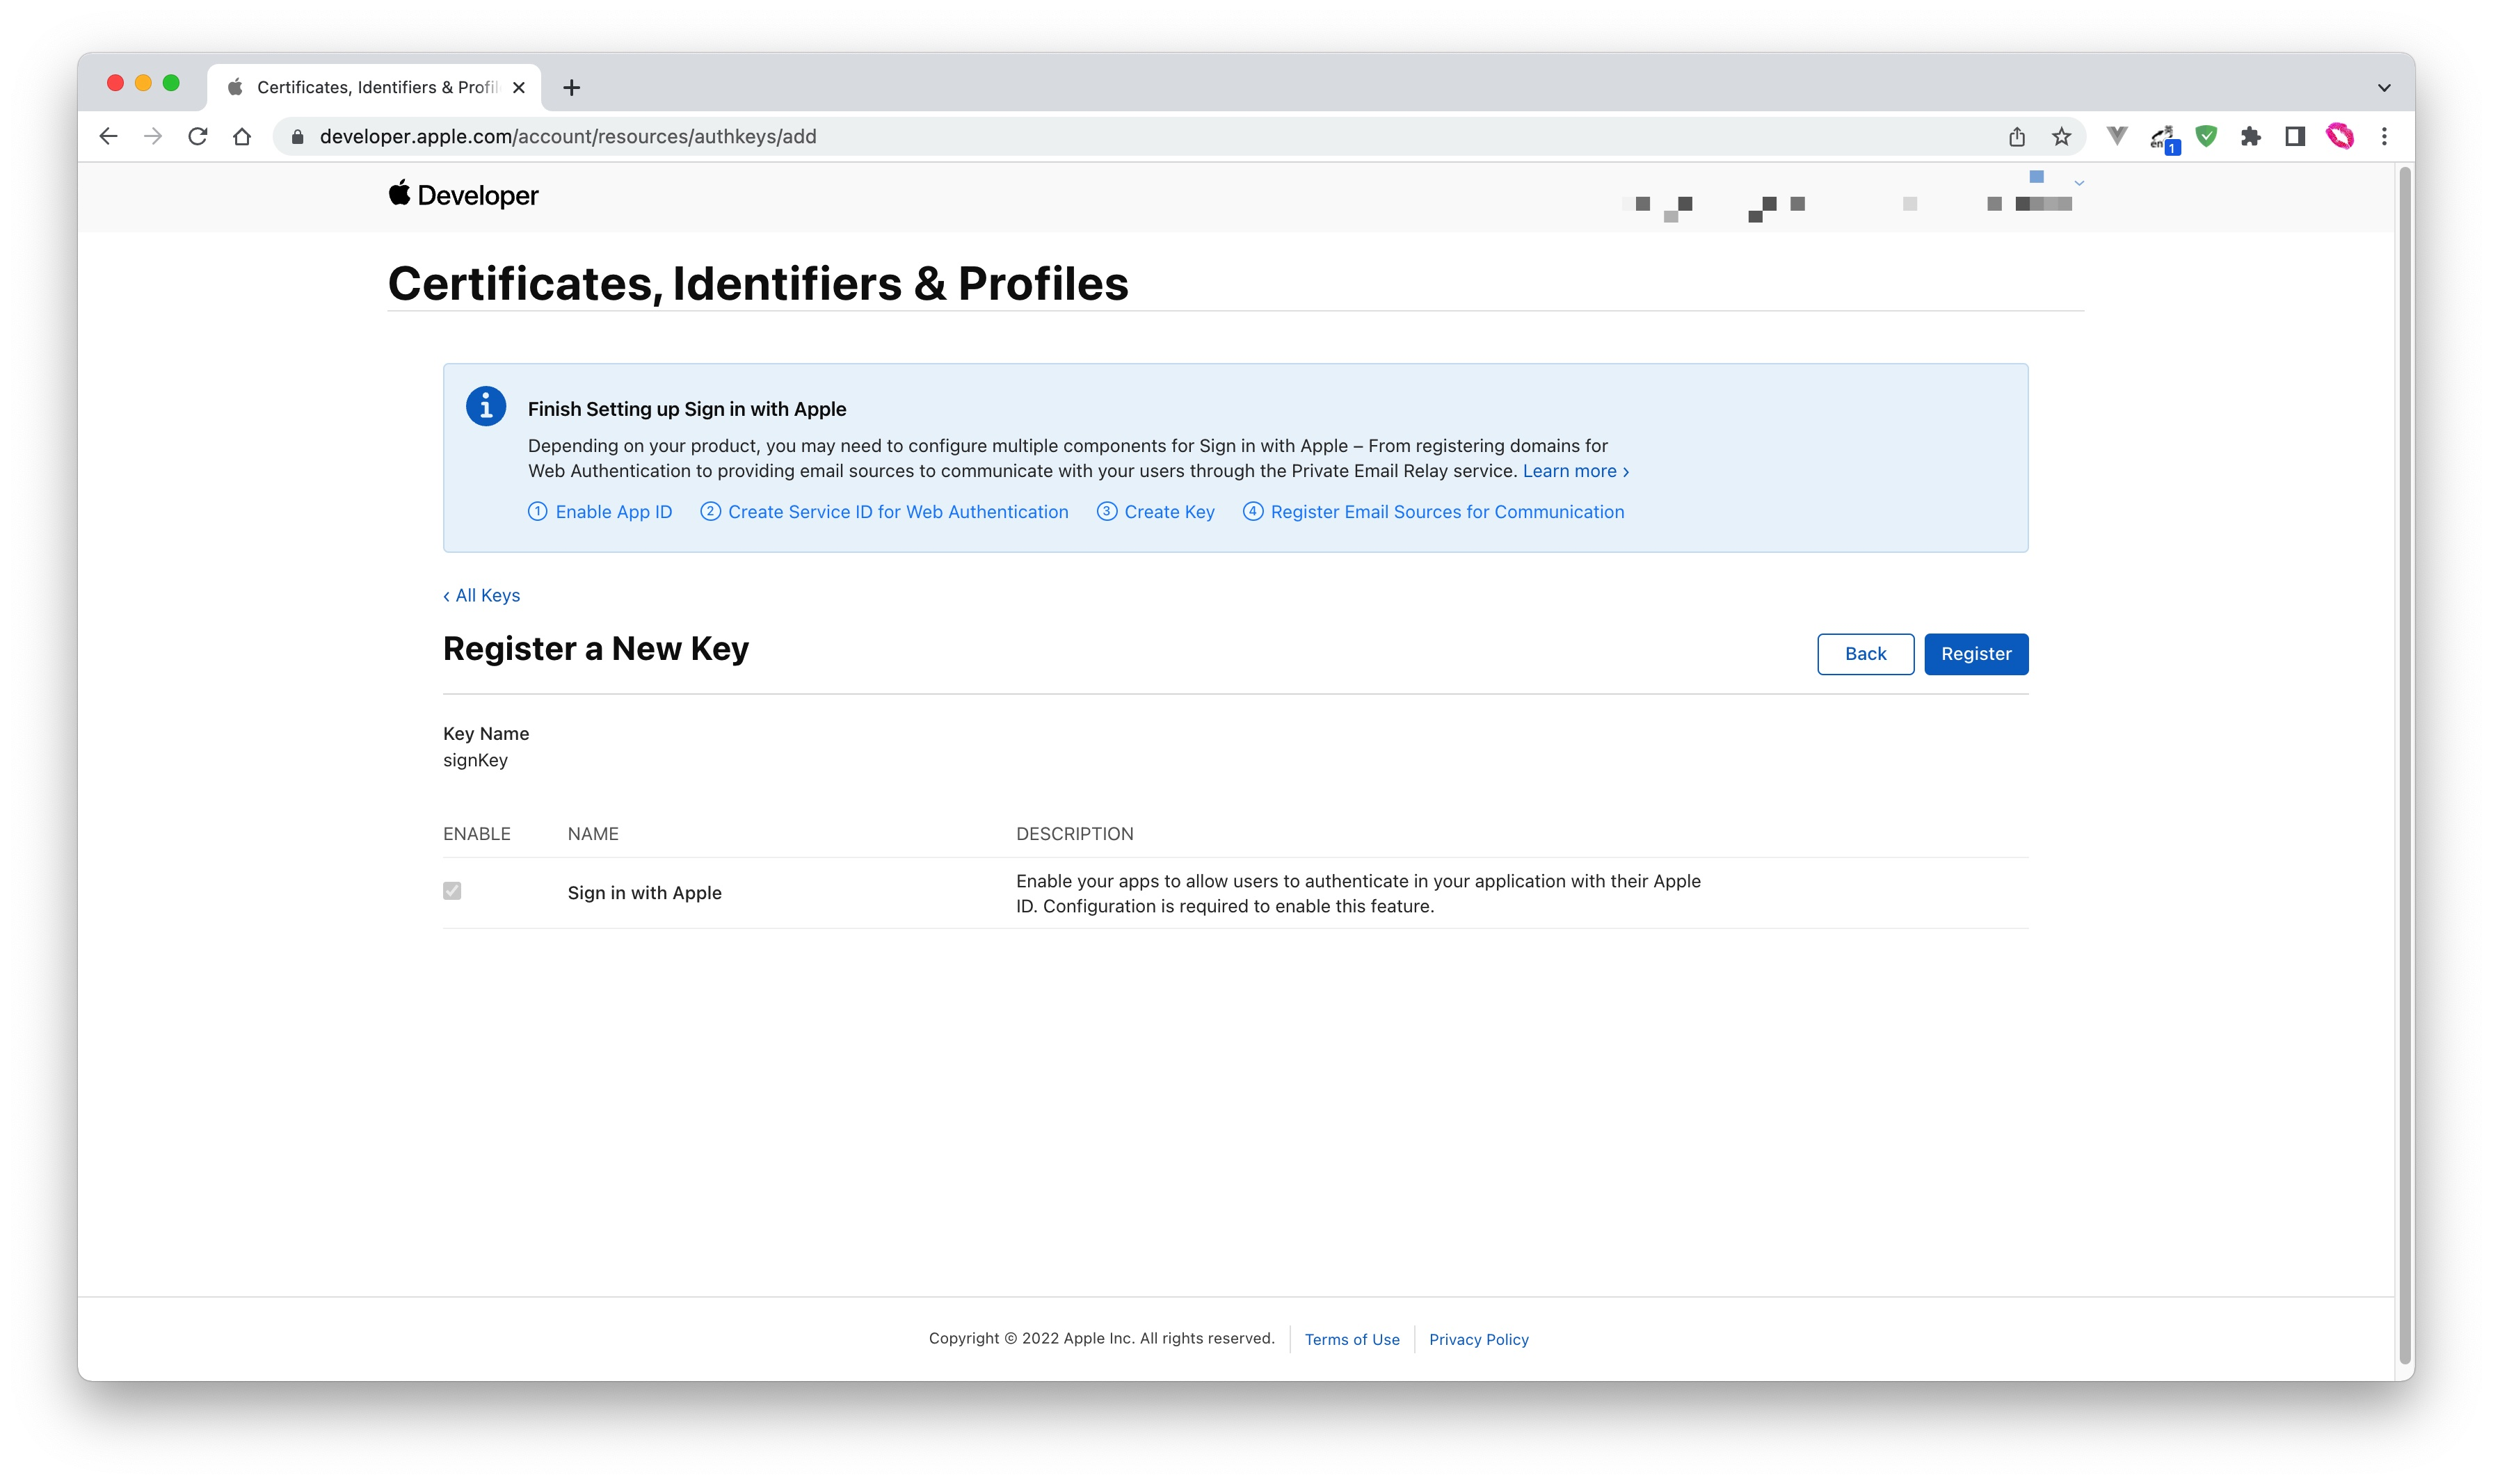
点击 Save, Continue, 最后点击 Register.
创建之后,记录下 Key ID,然后点击 Download 下载该密钥
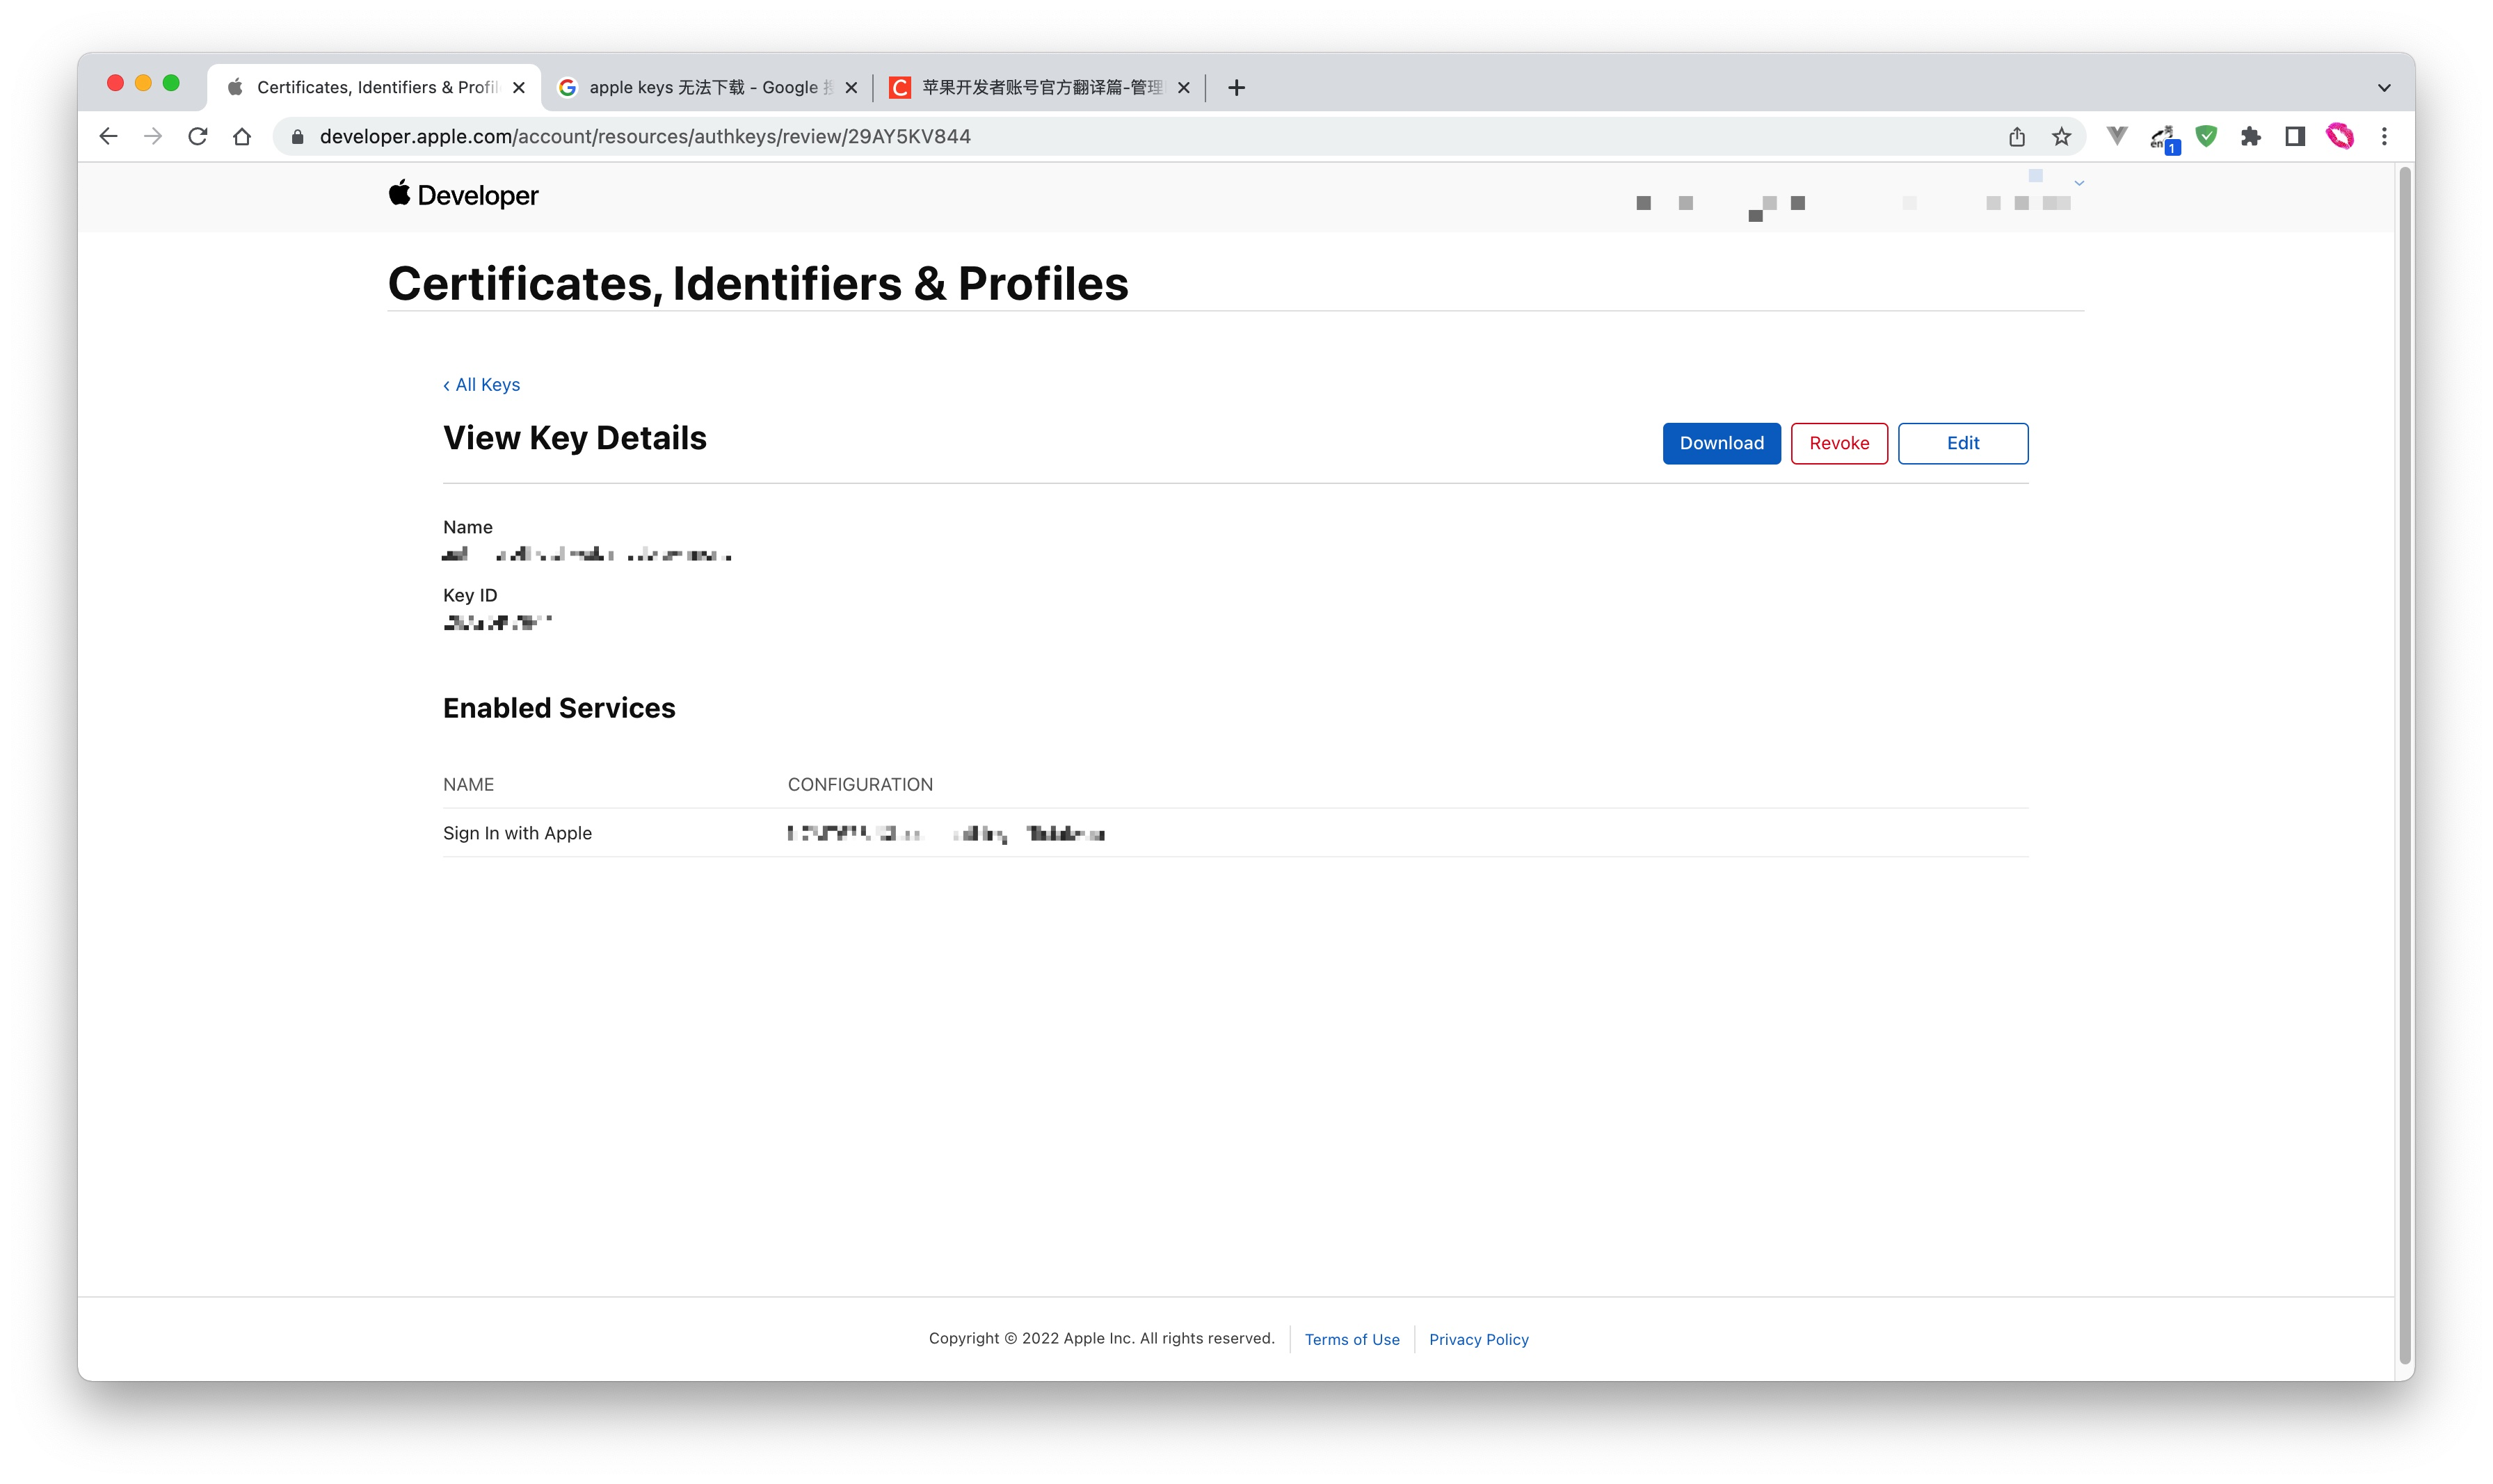
记录以下前面配置的:Service ID、Team ID、Key ID、Return URLs以及最后下载的密钥,后面我们会用到。
重要提示
“密钥”可保护你应用程序的安全,因此请确保其不会泄露!也不要与任何人共享你的“密钥”!!!
# 2. 集成JustAuth
# 2.1 引入依赖
<dependency>
  <groupId>me.zhyd.oauth</groupId>
  <artifactId>JustAuth</artifactId>
  <version>${latest.version}</version>
</dependency>
2
3
4
5
${latest.version}表示当前最新的版本,可以在这儿 (opens new window)获取最新的版本信息。
# 2.2 创建Request
AuthRequest authRequest = new AuthAppleRequest(AuthConfig.builder()
               .clientId("你的 ServiceID")
               .clientSecret("下载的密钥内容")
               .redirectUri("Return URLs 中可用的回调地址")
               .kid("密钥 ID,Key ID")
               .teamId("你的 TeamID")
               .build());
2
3
4
5
6
7
# 2.3 生成授权地址
我们可以直接使用以下方式生成第三方平台的授权链接:
String authorizeUrl = authRequest.authorize(AuthStateUtils.createState());
这个链接我们可以直接后台重定向跳转,也可以返回到前端后,前端控制跳转。前端控制的好处就是,可以将第三方的授权页嵌入到iframe中,适配网站设计。
# 2.4 引入依赖
<!-- 1.16.7 开始,集成 APPLE 时需要引入下面的依赖 -->
<dependency>
   <groupId>io.jsonwebtoken</groupId>
   <artifactId>jjwt-api</artifactId>
   <version>0.12.3</version>
</dependency>
<dependency>
   <groupId>io.jsonwebtoken</groupId>
   <artifactId>jjwt-impl</artifactId>
   <version>0.12.3</version>
</dependency>
<dependency>
   <groupId>io.jsonwebtoken</groupId>
   <artifactId>jjwt-jackson</artifactId>
   <version>0.12.3</version>
</dependency>
<dependency>
   <groupId>org.bouncycastle</groupId>
   <artifactId>bcpkix-jdk18on</artifactId>
   <version>1.78</version>
</dependency>
2
3
4
5
6
7
8
9
10
11
12
13
14
15
16
17
18
19
20
21
# 2.5 以上完整代码如下
import me.zhyd.oauth.config.AuthConfig;
import me.zhyd.oauth.request.AuthAppleRequest;
import me.zhyd.oauth.model.AuthCallback;
import me.zhyd.oauth.request.AuthRequest;
import me.zhyd.oauth.utils.AuthStateUtils;
import org.springframework.web.bind.annotation.PathVariable;
import org.springframework.web.bind.annotation.RequestMapping;
import org.springframework.web.bind.annotation.RestController;

import javax.servlet.http.HttpServletResponse;
import java.io.IOException;
import java.net.InetSocketAddress;
import java.net.Proxy;


@RestController
@RequestMapping("/oauth")
public class RestAuthController {

    @RequestMapping("/render")
    public void renderAuth(HttpServletResponse response) throws IOException {
        AuthRequest authRequest = getAuthRequest();
        response.sendRedirect(authRequest.authorize(AuthStateUtils.createState()));
    }

    @RequestMapping("/callback")
    public Object login(AuthCallback callback) {
        AuthRequest authRequest = getAuthRequest();
        return authRequest.login(callback);
    }

    private AuthRequest getAuthRequest() {
        return new AuthAppleRequest(AuthConfig.builder()
               .clientId("你的 ServiceID")
               .clientSecret("下载的密钥内容")
               .redirectUri("Return URLs 中可用的回调地址")
               .kid("密钥 ID,Key ID")
               .teamId("你的 TeamID")
               .build());
    }
}
2
3
4
5
6
7
8
9
10
11
12
13
14
15
16
17
18
19
20
21
22
23
24
25
26
27
28
29
30
31
32
33
34
35
36
37
38
39
40
41
授权链接访问成功后会看到以下页面内容:
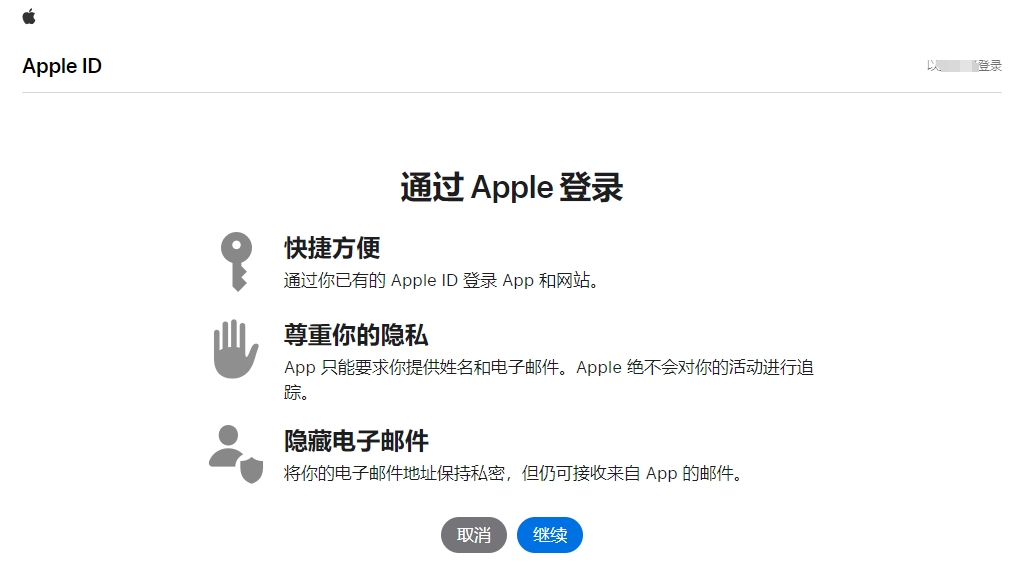
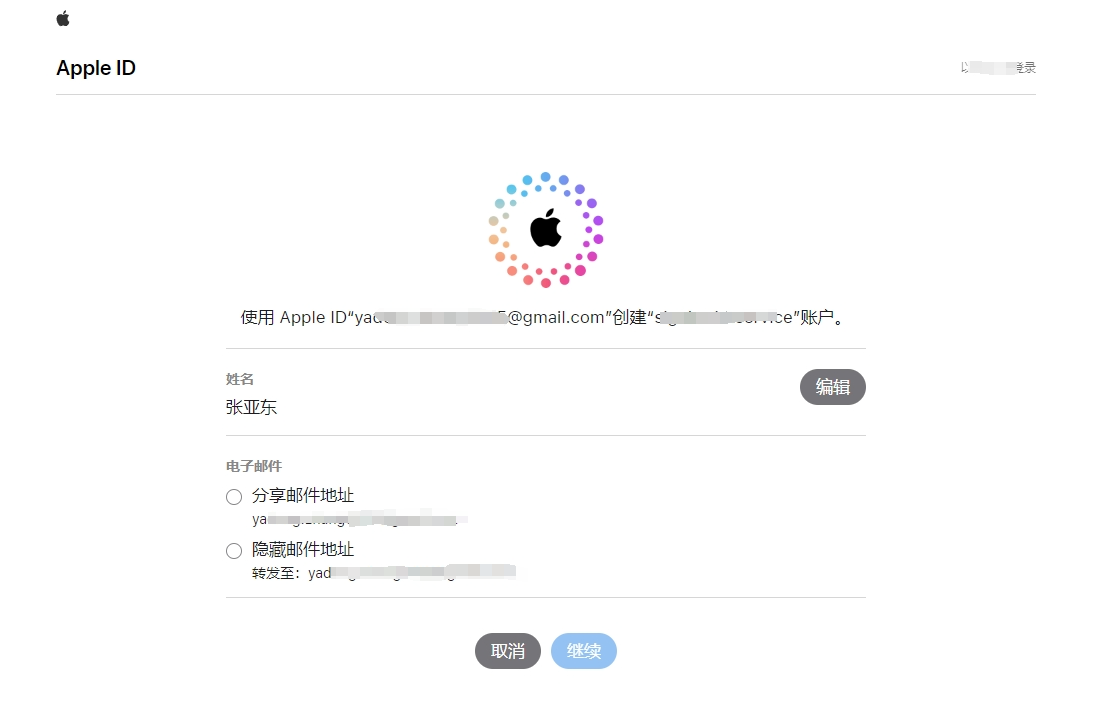
点击“集序”即可完成 OAuth 登录。
# 3. 授权结果
注意
数据已脱敏
{
	"code": 2000,
	"data": {
		"email": "yadxxx@gmail.com",
		"rawUserInfo": {
			"at_hash": "23h_OmTxxaFiKTPA",
			"aud": "com.xxvice",
			"sub": "001773.04d56xxx2.1301",
			"nonce_supported": true,
			"email_verified": true,
			"auth_time": 1726234028,
			"iss": "https://appleid.apple.com",
			"exp": 1726320467,
			"iat": 1726234067,
			"email": "yadxxx@gmail.com"
		},
		"snapshotUser": false,
		"source": "APPLE",
		"token": {
			"accessToken": "a80533axxxzgov-bXTIQ",
			"expireIn": 3600,
			"idToken": "eyJraWQiOiJwZ2duxxxwiYXVkIjoiY2xxx",
			"refreshToken": "r6ebe5c836cee4xxx7pVReWPg",
			"refreshTokenExpireIn": 0,
			"snapshotUser": false,
			"tokenType": "Bearer"
		},
		"uuid": "0017xxxd62.1301"
	}
}
2
3
4
5
6
7
8
9
10
11
12
13
14
15
16
17
18
19
20
21
22
23
24
25
26
27
28
29
30
# 3. 推荐
官方推荐使用 JustAuth-demo (opens new window) 示例项目进行测试。
使用步骤:
- clone: https://github.com/justauth/JustAuth-demo.git (opens new window)
- 将上面申请的应用信息填入到
RestAuthController#getAuthRequest方法的对应位置中:
- 启动项目,访问 http://localhost:8443 (opens new window)
- 选择对应的平台进行授权登录

- 登录完成后,可以访问http://localhost:8443/users (opens new window)查看已授权的用户

注意
- 如果直接使用 JustAuth-demo 项目进行测试,那么在配置测试应用的“回调地址”时要严格按照以下格式配置:
http://localhost:8443/oauth/callback/{平台名} - 平台名参考
JustAuthPlatformInfo枚举类names