 Coding(腾讯云)登录
# 1. 申请应用
# 创建 CODING 应用
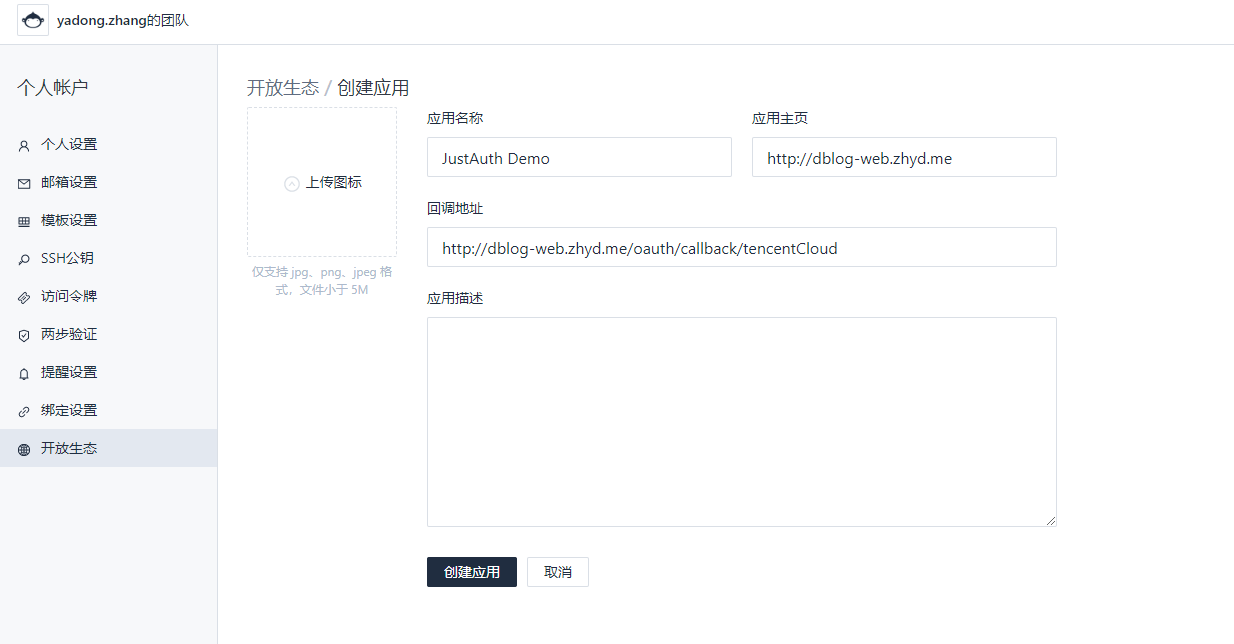
- 点击【个人设置】->【开放生态】->【创建应用】,注册需要接入 CODING 的应用。
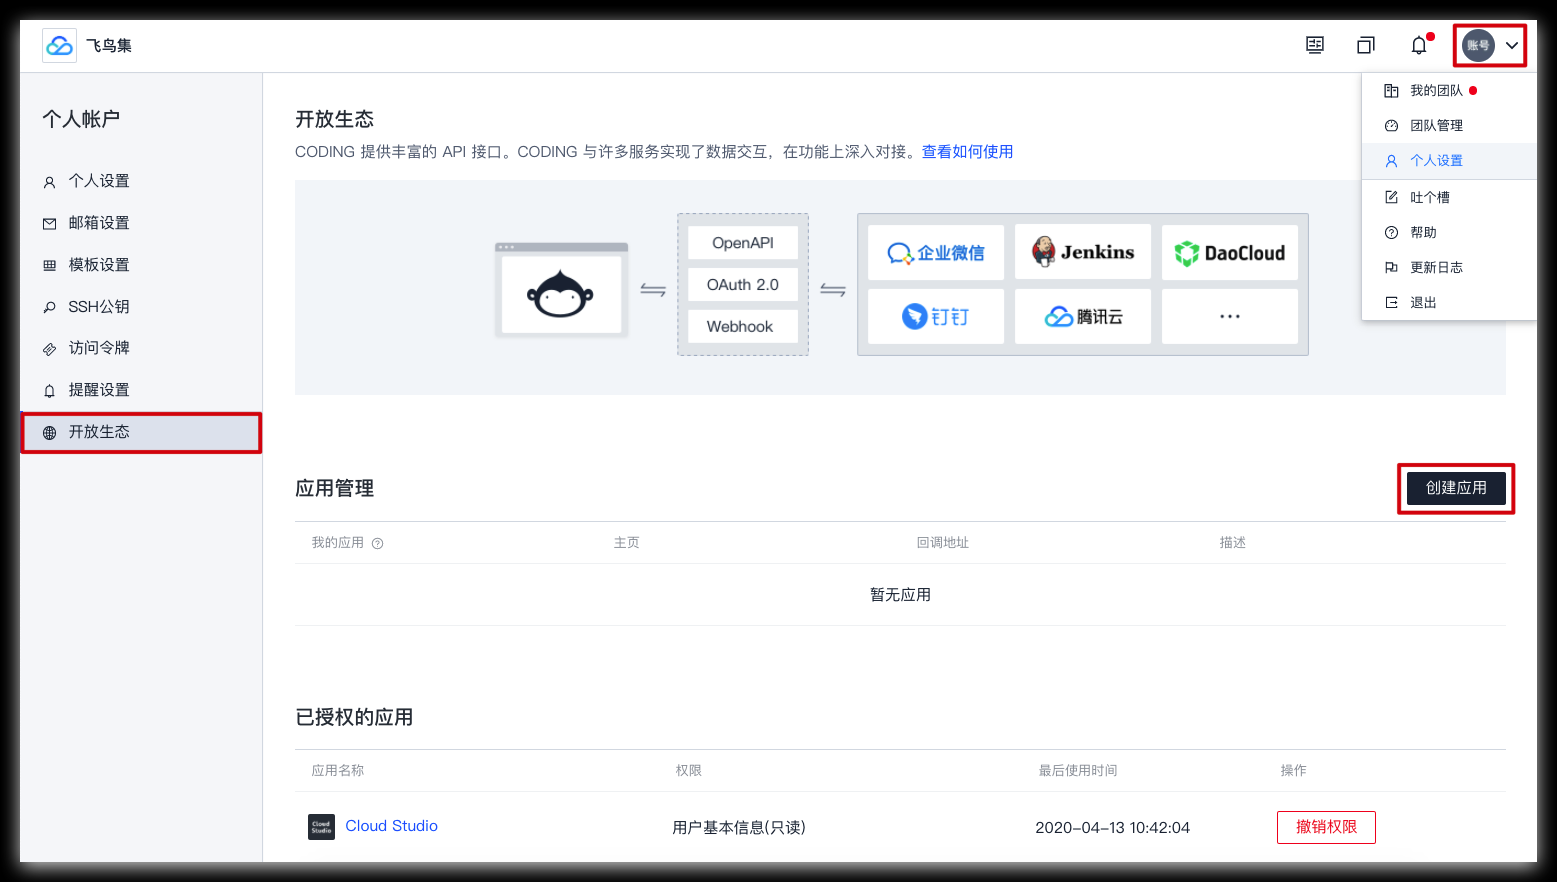
- 在创建应用页面,填写接入的应用信息:
- 应用名称、应用主页及回调地址为必填项;
- 其中回调地址是用户授权后,CODING 回调到应用,并且回传授权码的地址;
- 如果没有上传图标将自动生成应用图标。
填写完毕后,点击【创建应用】。
注意
💡回调地址不支持 127.0.0.1、localhost 等配置
- 应用创建完成后,在应用详情页,会生成 Client ID 和 Client Secret ,保存以便后续认证使用。
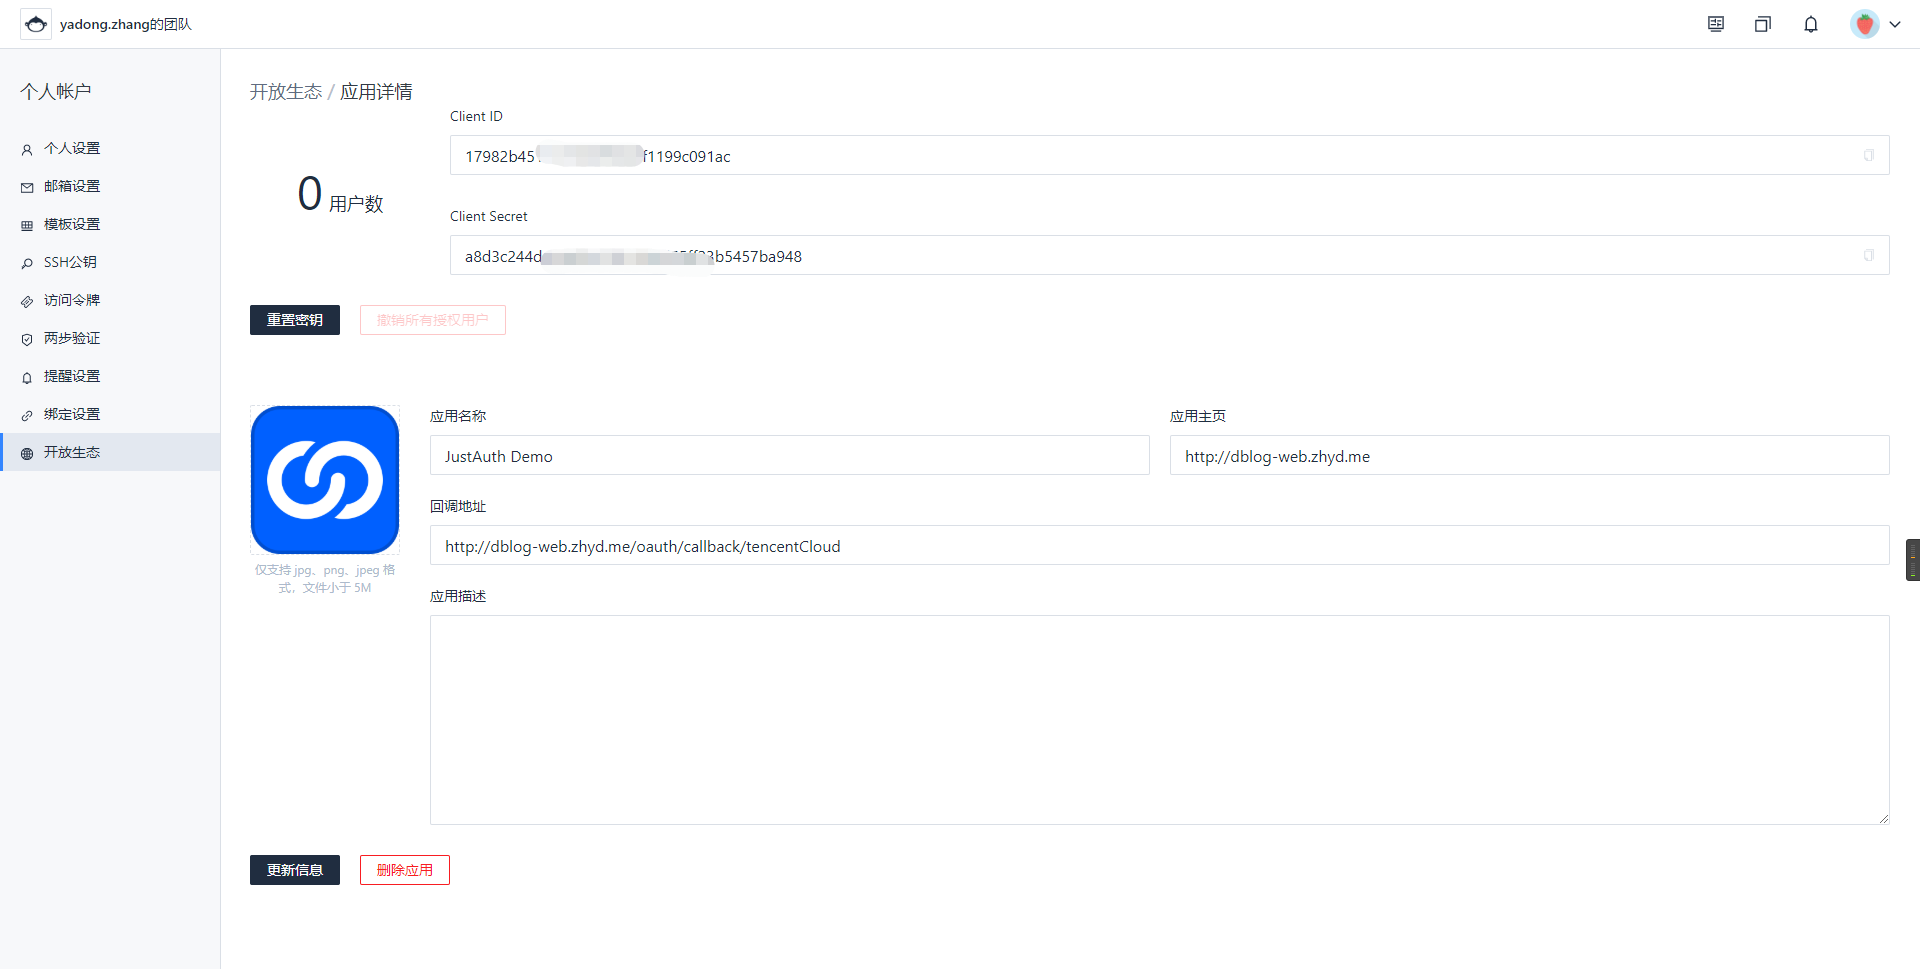
重要提示
“应用密钥”可保护你应用程序的安全,因此请确保其不会泄露!也不要与任何人共享你的“应用密钥”!!!
# 2. 集成JustAuth
# 2.1 引入依赖
<dependency>
  <groupId>me.zhyd.oauth</groupId>
  <artifactId>JustAuth</artifactId>
  <version>${latest.version}</version>
</dependency>
1
2
3
4
5
2
3
4
5
${latest.version}推荐使用最新版本
 ,可以在这儿 (opens new window)获取最新的版本信息。
# 2.2 创建Request
AuthRequest authRequest = new AuthTencentCloudRequest(AuthConfig.builder()
                .clientId("App Key")
                .clientSecret("App Secret")
                .redirectUri("授权回调页")
                .domainPrefix("团队名")
                .build());
1
2
3
4
5
6
2
3
4
5
6
# 2.3 生成授权地址
我们可以直接使用以下方式生成第三方平台的授权链接:
String authorizeUrl = authRequest.authorize(AuthStateUtils.createState());
1
这个链接我们可以直接后台重定向跳转,也可以返回到前端后,前端控制跳转。前端控制的好处就是,可以将第三方的授权页嵌入到iframe中,适配网站设计。
# 2.4 以上完整代码如下
import me.zhyd.oauth.config.AuthConfig;
import me.zhyd.oauth.request.AuthCodingRequest;
import me.zhyd.oauth.model.AuthCallback;
import me.zhyd.oauth.model.AuthToken;
import me.zhyd.oauth.request.AuthRequest;
import me.zhyd.oauth.utils.AuthStateUtils;
import org.springframework.web.bind.annotation.PathVariable;
import org.springframework.web.bind.annotation.RequestMapping;
import org.springframework.web.bind.annotation.RestController;

import javax.servlet.http.HttpServletResponse;
import java.io.IOException;


@RestController
@RequestMapping("/oauth")
public class RestAuthController {

    @RequestMapping("/render")
    public void renderAuth(HttpServletResponse response) throws IOException {
        AuthRequest authRequest = getAuthRequest();
        response.sendRedirect(authRequest.authorize(AuthStateUtils.createState()));
    }

    @RequestMapping("/callback")
    public Object login(AuthCallback callback) {
        AuthRequest authRequest = getAuthRequest();
        return authRequest.login(callback);
    }

    @RequestMapping("/revoke/{token}")
    public Object revokeAuth(@PathVariable("token") String token) throws IOException {
        AuthRequest authRequest = getAuthRequest();
        return authRequest.revoke(AuthToken.builder().accessToken(token).build());
    }

    private AuthRequest getAuthRequest() {
        return new AuthCodingRequest(AuthConfig.builder()
               .clientId("App Key")
               .clientSecret("App Secret")
               .redirectUri("授权回调页")
               // 比如以“ https://justauth.coding.net/ ”为例,codingGroupName = justauth
               .domainPrefix("团队名")
               .build());
    }
}
1
2
3
4
5
6
7
8
9
10
11
12
13
14
15
16
17
18
19
20
21
22
23
24
25
26
27
28
29
30
31
32
33
34
35
36
37
38
39
40
41
42
43
44
45
46
2
3
4
5
6
7
8
9
10
11
12
13
14
15
16
17
18
19
20
21
22
23
24
25
26
27
28
29
30
31
32
33
34
35
36
37
38
39
40
41
42
43
44
45
46
授权链接访问成功后会看到以下页面内容:

# 3. 授权结果
{
    "code": 2000,
    "msg": null,
    "data": {
        "uuid": "xxx",
        "username": "yadong.zhang",
        "nickname": "yadong.zhang",
        "avatar": "https://coding.net/static/fruit_avatar/Fruit-6.png",
        "blog": "https://coding.net/u/HNMxPTOFRd",
        "company": "",
        "location": "",
        "email": null,
        "remark": "",
        "gender": "FEMALE",
        "source": "CODING",
        "token": {
            "accessToken": "xx",
            "expireIn": 858292,
            "refreshToken": "xx",
            "uid": null,
            "openId": null,
            "accessCode": null,
            "unionId": null,
            "scope": null,
            "tokenType": null,
            "idToken": null,
            "macAlgorithm": null,
            "macKey": null,
            "code": null,
            "oauthToken": null,
            "oauthTokenSecret": null,
            "userId": null,
            "screenName": null,
            "oauthCallbackConfirmed": null
        }
    }
}
1
2
3
4
5
6
7
8
9
10
11
12
13
14
15
16
17
18
19
20
21
22
23
24
25
26
27
28
29
30
31
32
33
34
35
36
37
2
3
4
5
6
7
8
9
10
11
12
13
14
15
16
17
18
19
20
21
22
23
24
25
26
27
28
29
30
31
32
33
34
35
36
37
# 4. 推荐
官方推荐使用 JustAuth-demo (opens new window) 示例项目进行测试。
使用步骤:
- clone: https://github.com/justauth/JustAuth-demo.git (opens new window)
- 将上面申请的应用信息填入到
RestAuthController#getAuthRequest方法的对应位置中:
- 启动项目,访问 http://localhost:8443 (opens new window)
- 选择对应的平台进行授权登录

- 登录完成后,可以访问http://localhost:8443/users (opens new window)查看已授权的用户

注意
- 如果直接使用 JustAuth-demo 项目进行测试,那么在配置测试应用的“回调地址”时要严格按照以下格式配置:
http://localhost:8443/oauth/callback/{平台名} - 平台名参考
JustAuthPlatformInfo枚举类names
编辑 (opens new window)
Last Updated: 2024/09/01, 18:42:02